Bitdive User Management Dashboard
This guide provides comprehensive instructions on how to navigate and use the Bitdive User Management Dashboard. Here, you can create new users, manage their roles and permissions, filter your user list, and maintain overall system access control.
Dashboard Overview
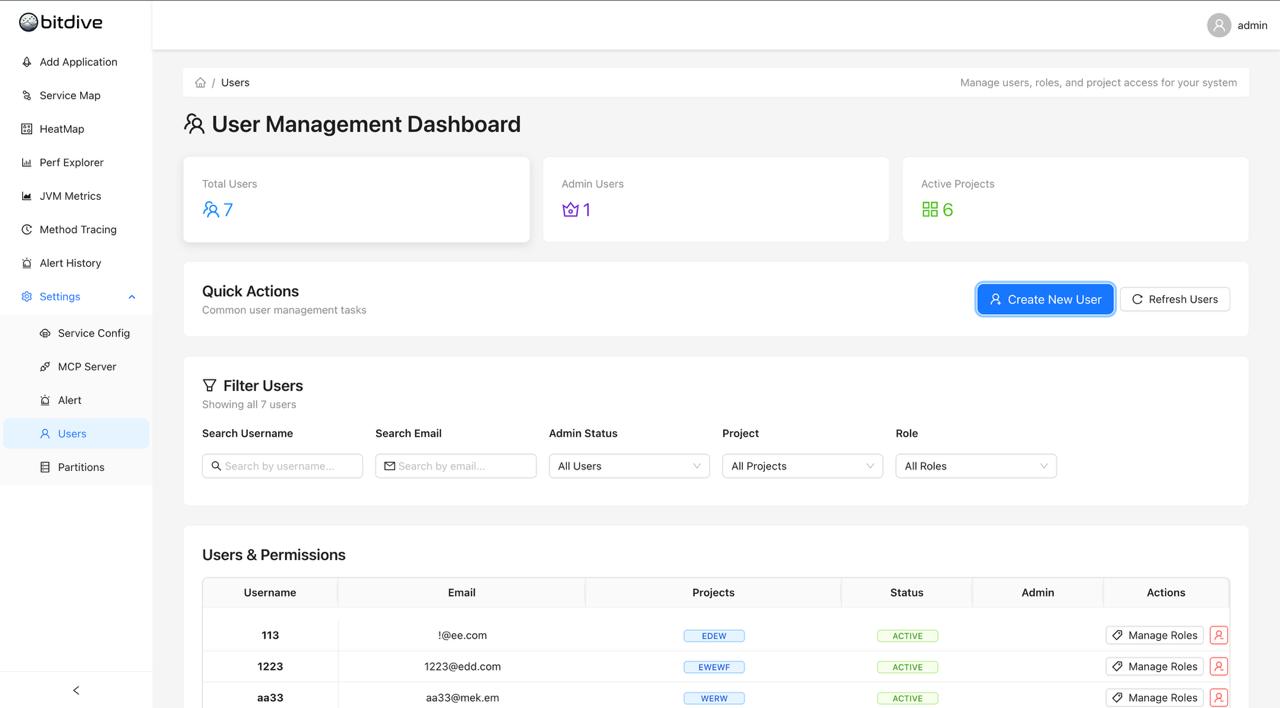
The main dashboard provides an at-a-glance view of user statistics and provides access to all user management functions.
Key Metrics
At the top of the page, you will find summary cards displaying:
- Total Users: The total number of registered users in the system
- Admin Users: The count of users who have administrator privileges
- Active Projects: The total number of unique projects users are assigned to
Quick Actions
- Create New User: Opens a dialog to add a new user to the system
- Refresh Users: Reloads the user list to show the most up-to-date information
Users & Permissions Table
This table lists all users and their relevant details:
- Username / Email: User identification details
- Projects: The projects the user has access to
- Status: The user's account status (e.g., ACTIVE)
- Admin: Indicates if the user has administrator privileges
- Actions: Provides tools to manage individual users
Creating a New User
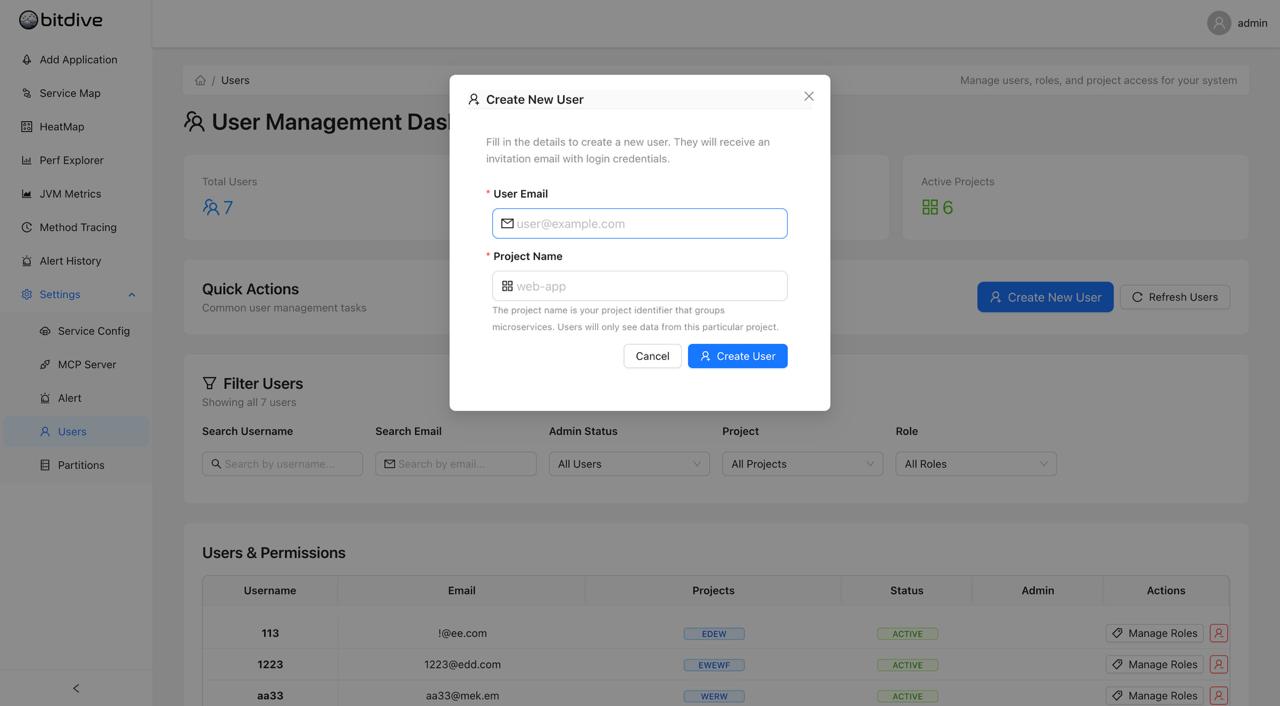
To invite a new user to Bitdive, follow these steps:
-
From the main dashboard, click the Create New User button.
-
A "Create New User" window will appear.
-
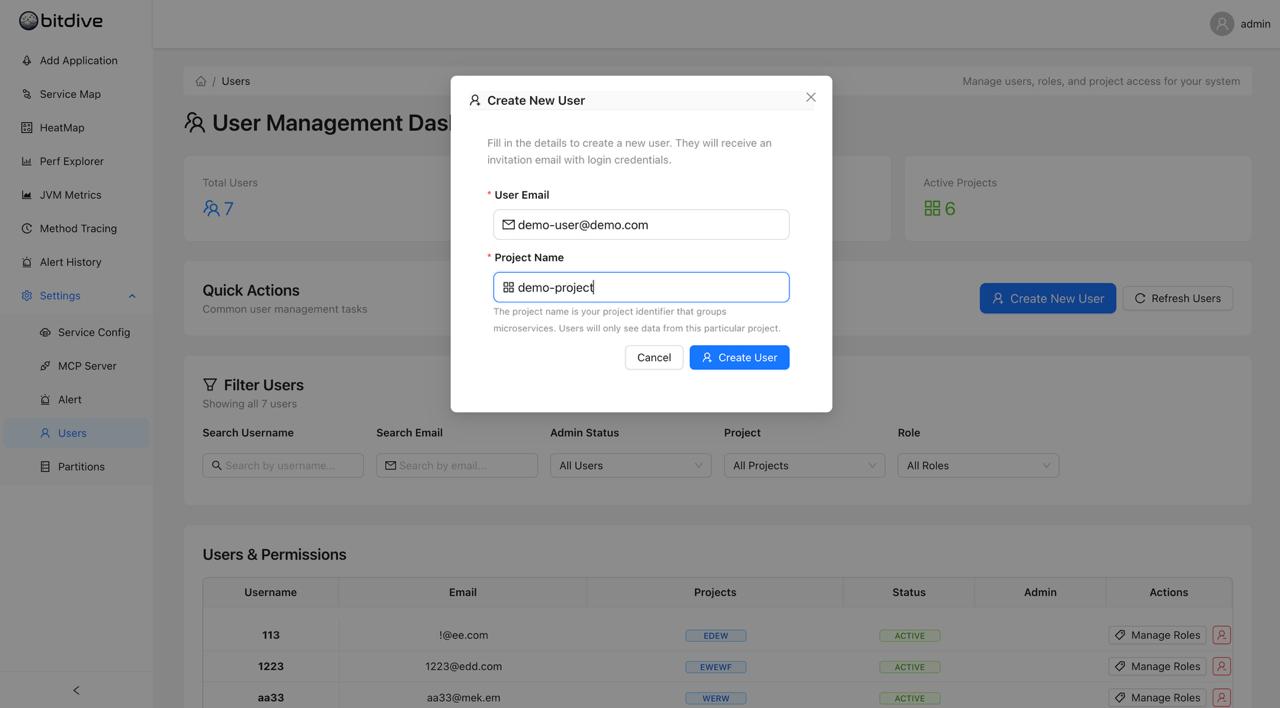
Fill in the required details:
- User Email: Enter the email address of the new user. They will receive an invitation with login credentials at this address.
- Project Name: Assign the user to a project. The project name acts as an identifier to group microservices, and users will only see data from the project(s) they are assigned to.
-
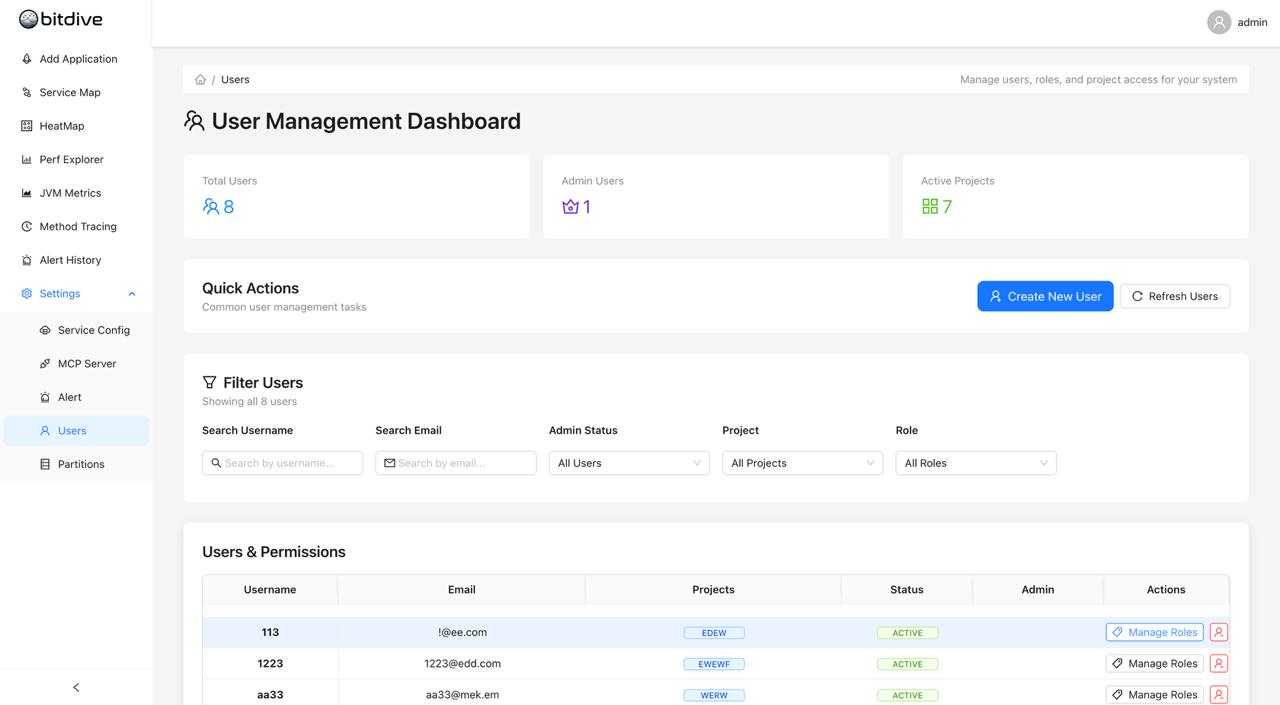
Click the Create User button to send the invitation. The user will be added to the system.
Managing User Roles and Permissions
You can assign or revoke roles for any user, including granting administrator privileges.
-
Find the user you wish to manage in the "Users & Permissions" table.
-
In the "Actions" column for that user, click Manage Roles.
-
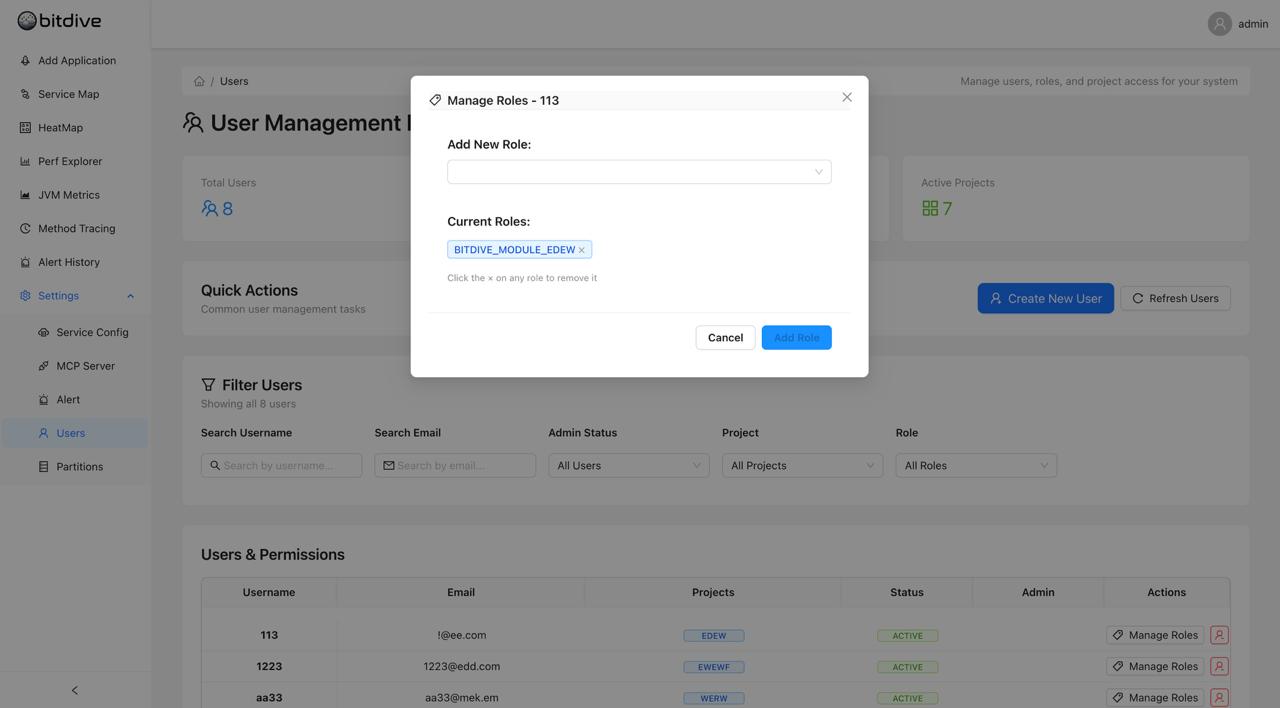
The "Manage Roles" window will open.
Adding a Role
-
Click the dropdown menu under Add New Role.
-
Select the role you want to assign from the list.
-
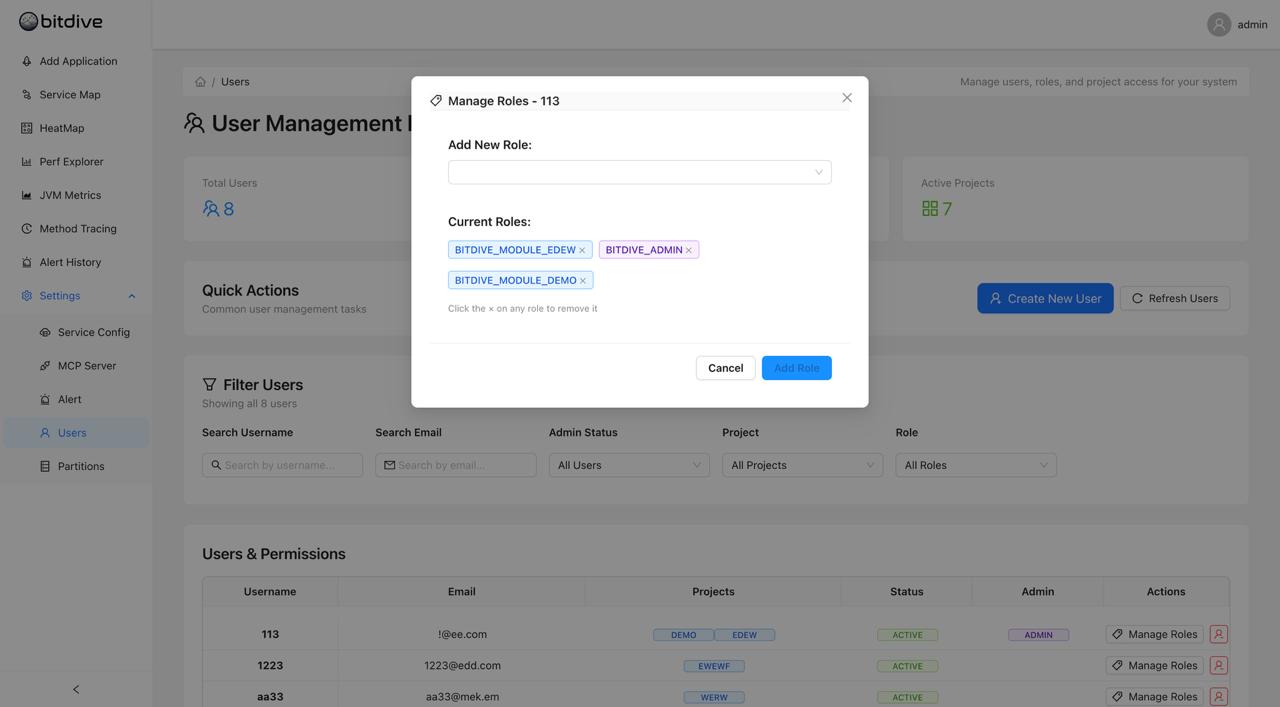
Click the Add Role button. The new role will appear under the "Current Roles" list.
Note: To grant a user administrator rights, assign them the
BITDIVE_ADMINrole. This will be reflected in the "Admin" column on the main dashboard.
Removing a Role
-
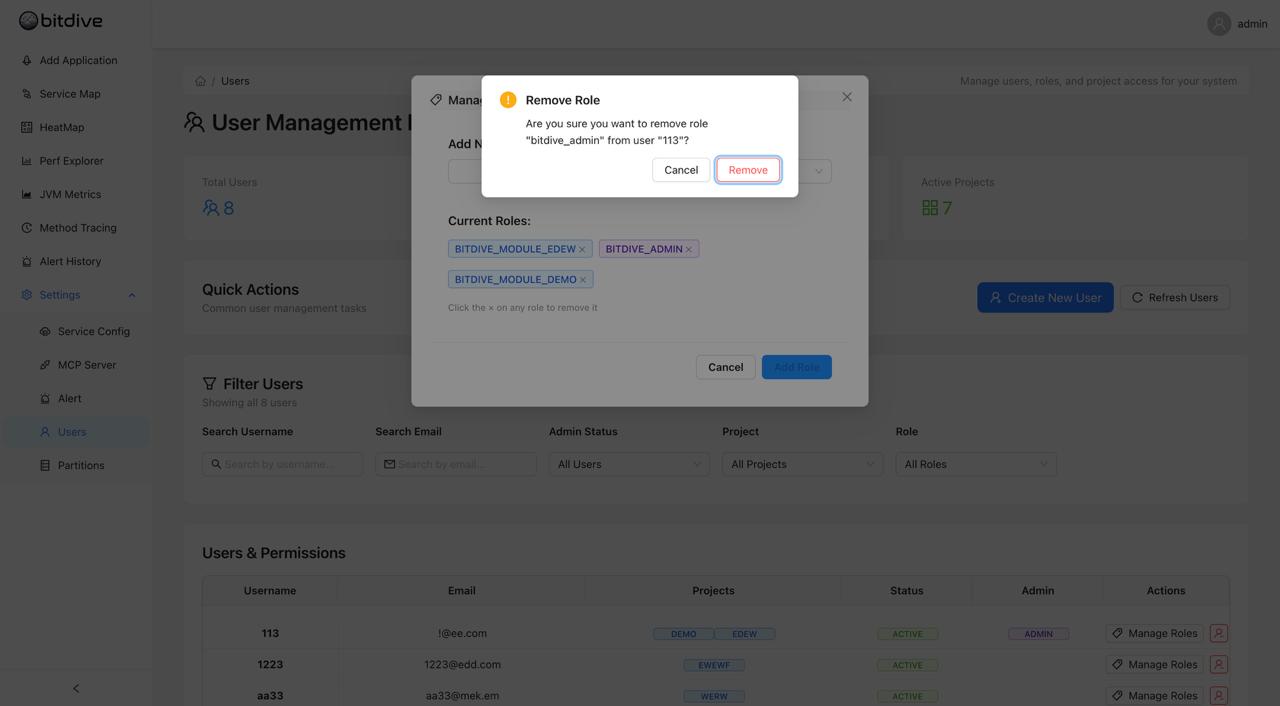
Under the "Current Roles" list, find the role you want to remove.
-
Click the 'x' next to the role name.
-
A confirmation window will appear. Click Remove to confirm the action.
Filtering and Searching for Users
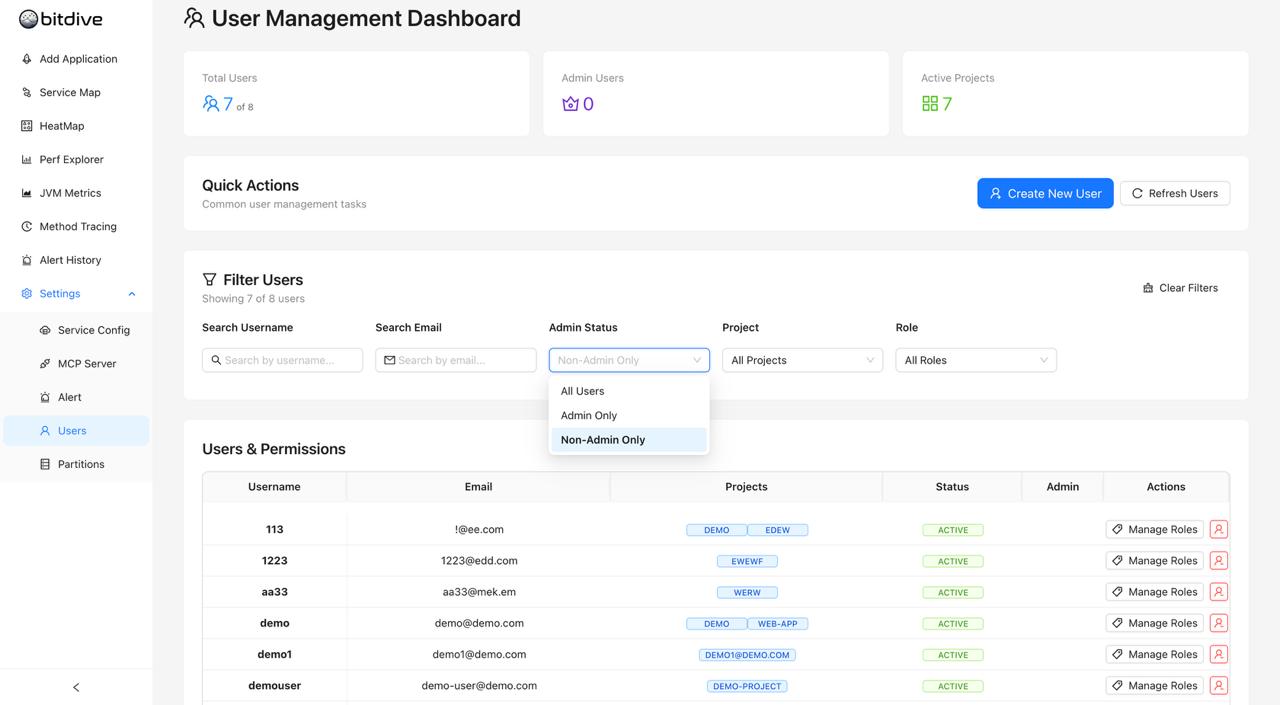
The "Filter Users" section allows you to narrow down the user list to find specific accounts.
You can filter by any of the following criteria:
- Search Username: Type a username to search for a specific user
- Search Email: Type an email to search for a specific user
- Admin Status: Use the dropdown to filter by user type:
All UsersAdmin OnlyNon-Admin Only
- Project: Select a project to see all users assigned to it
- Role: Select a role to see all users with that role
To reset all filters and view all users, click Clear Filters.
User Details and Actions
When viewing user details, you can see comprehensive information about each user's account and perform various management actions.
Available Actions
- Edit User: Modify user information and settings
- Manage Roles: Assign or remove user roles and permissions
- Deactivate User: Temporarily disable a user account
- Delete User: Permanently remove a user from the system (use with caution)
Related Documentation
- Getting Started - Initial setup and configuration
- Configuration - System configuration options
- System Architecture - Understanding the platform architecture
- Privacy Policy - Data protection and privacy information