Creating Automated Java Unit Tests
Create comprehensive JUnit regression suites without writing a single line of mock code.
BitDive captures real execution flows from your application and transforms them into deterministic tests. You eliminate the need for manual Mockito configurations. Tests are built from real runtime data, not AI predictions, so they work on the first run.
Establishing a Behavioral Baseline
The outcome is a behavioral baseline: an immutable record of how your application behaves under specific conditions. When you refactor code or merge AI-generated features, you aren't just checking if the code compiles. You are proving it still behaves the same way it did in production.
Engineering Insight Eliminate Mocks: How Record/Replay Revolutionizes Enterprise Java Testing
Next: Creating Your First Unit Test
Video Guide: Automated Test Creation
Prerequisites
Before we begin, make sure your environment is ready:
- BitDive Connected: Your application is running with the BitDive agent attached.
- Traffic Flowing: You can access your application (localhost or staging) to trigger actions.
- Project Configured: Your
pom.xmlorbuild.gradleincludes the BitDive dependencies (viewable as standard JUnit dependencies).
Step 1: Capture Java Application Traffic
The most reliable tests typically come from real usage. Instead of guessing at valid request structures, simply perform the action to record the behavior.
Start your application and interact with it to produce traffic.
- Log in to the system.
- Create a new entity (e.g., a "Student" or "Order").
- Trigger a complex workflow (e.g., "Create End-of-Year Report").
- Force an error (e.g., try to delete a non-existent item) to capture your error handling logic.
BitDive silently observes these actions, saving the execution path for test creation.
Step 2: Inspect Captured Traces
Switch to the BitDive dashboard. You'll see a visualization of the activity you just generated.
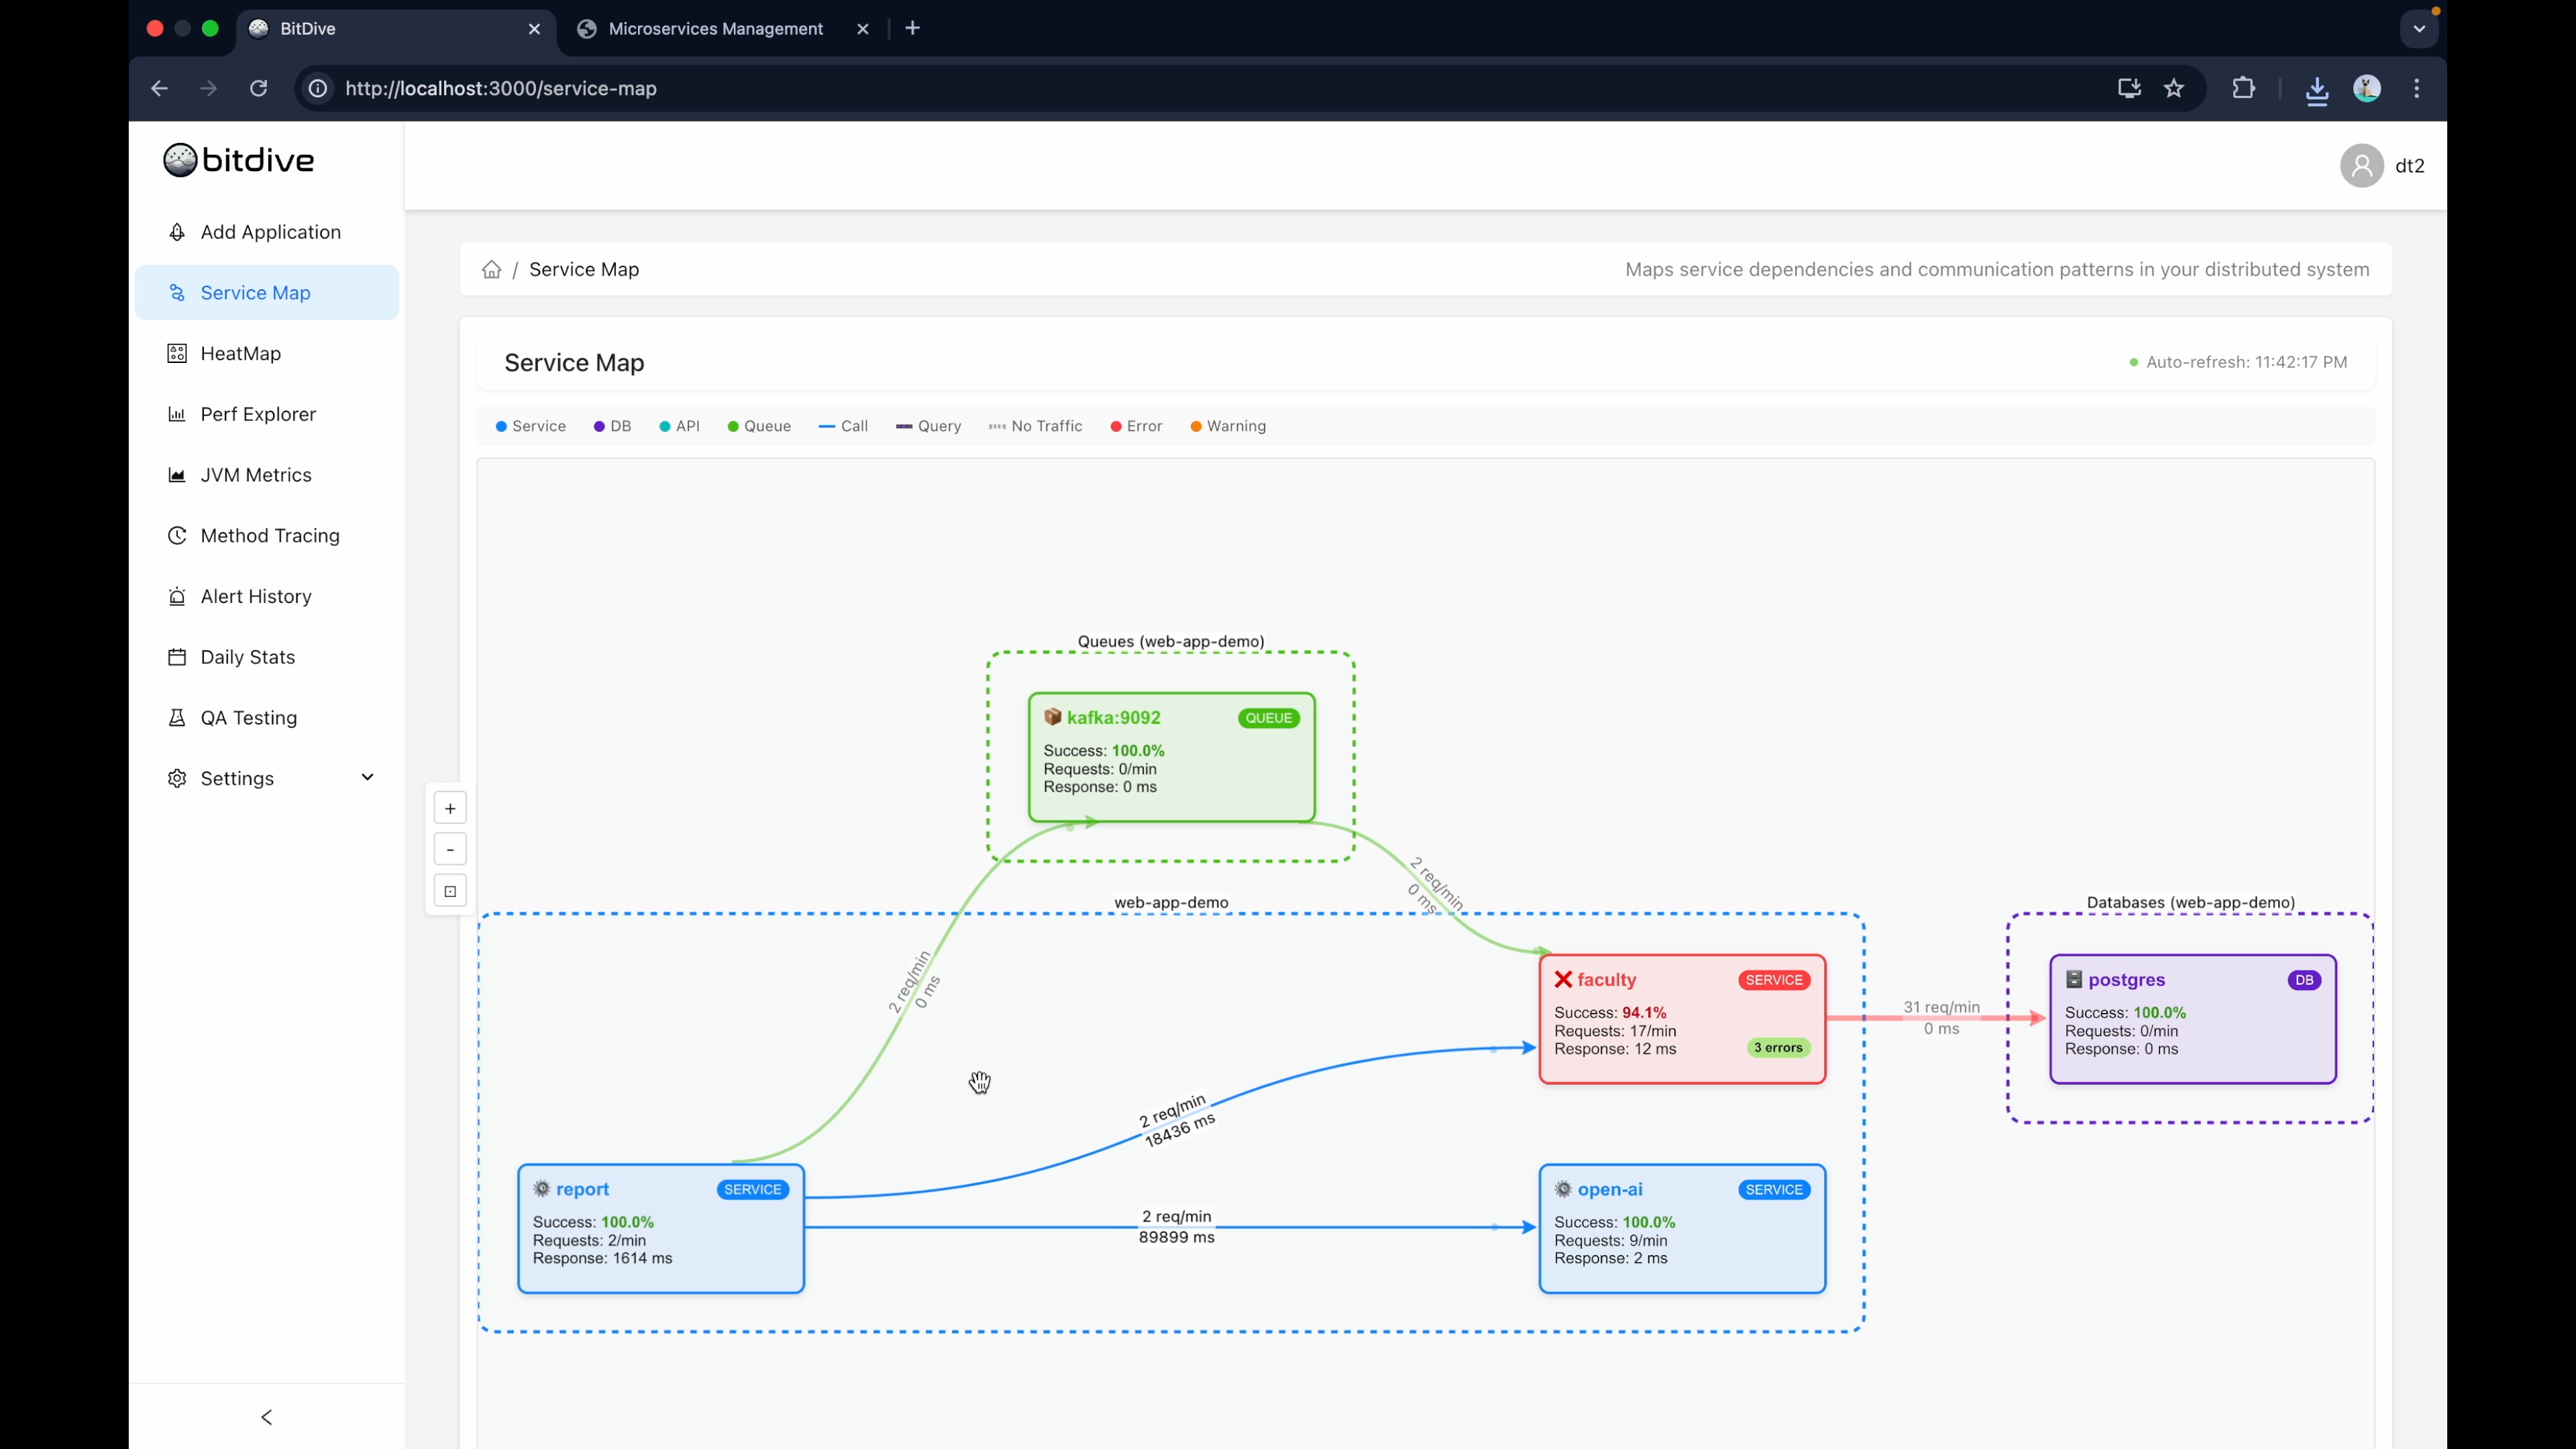
The Service Map gives you the high-level view, showing how your request bounced from the Frontend to the API, then to the Database, and maybe out to a 3rd-party service.
Click into the HeatMap to see the DNA of the request. This is where you verify you captured the intended logic. Did the "Create Student" flow successfully execute the SQL insert?
If the trace represents the correct behavior, you are ready to convert it into a JUnit test case.
Step 3: Select Your Test Candidates
Navigate to the Testing tab and click Create Test.
Give your test a meaningful name, like Regression Suite - Student Management.
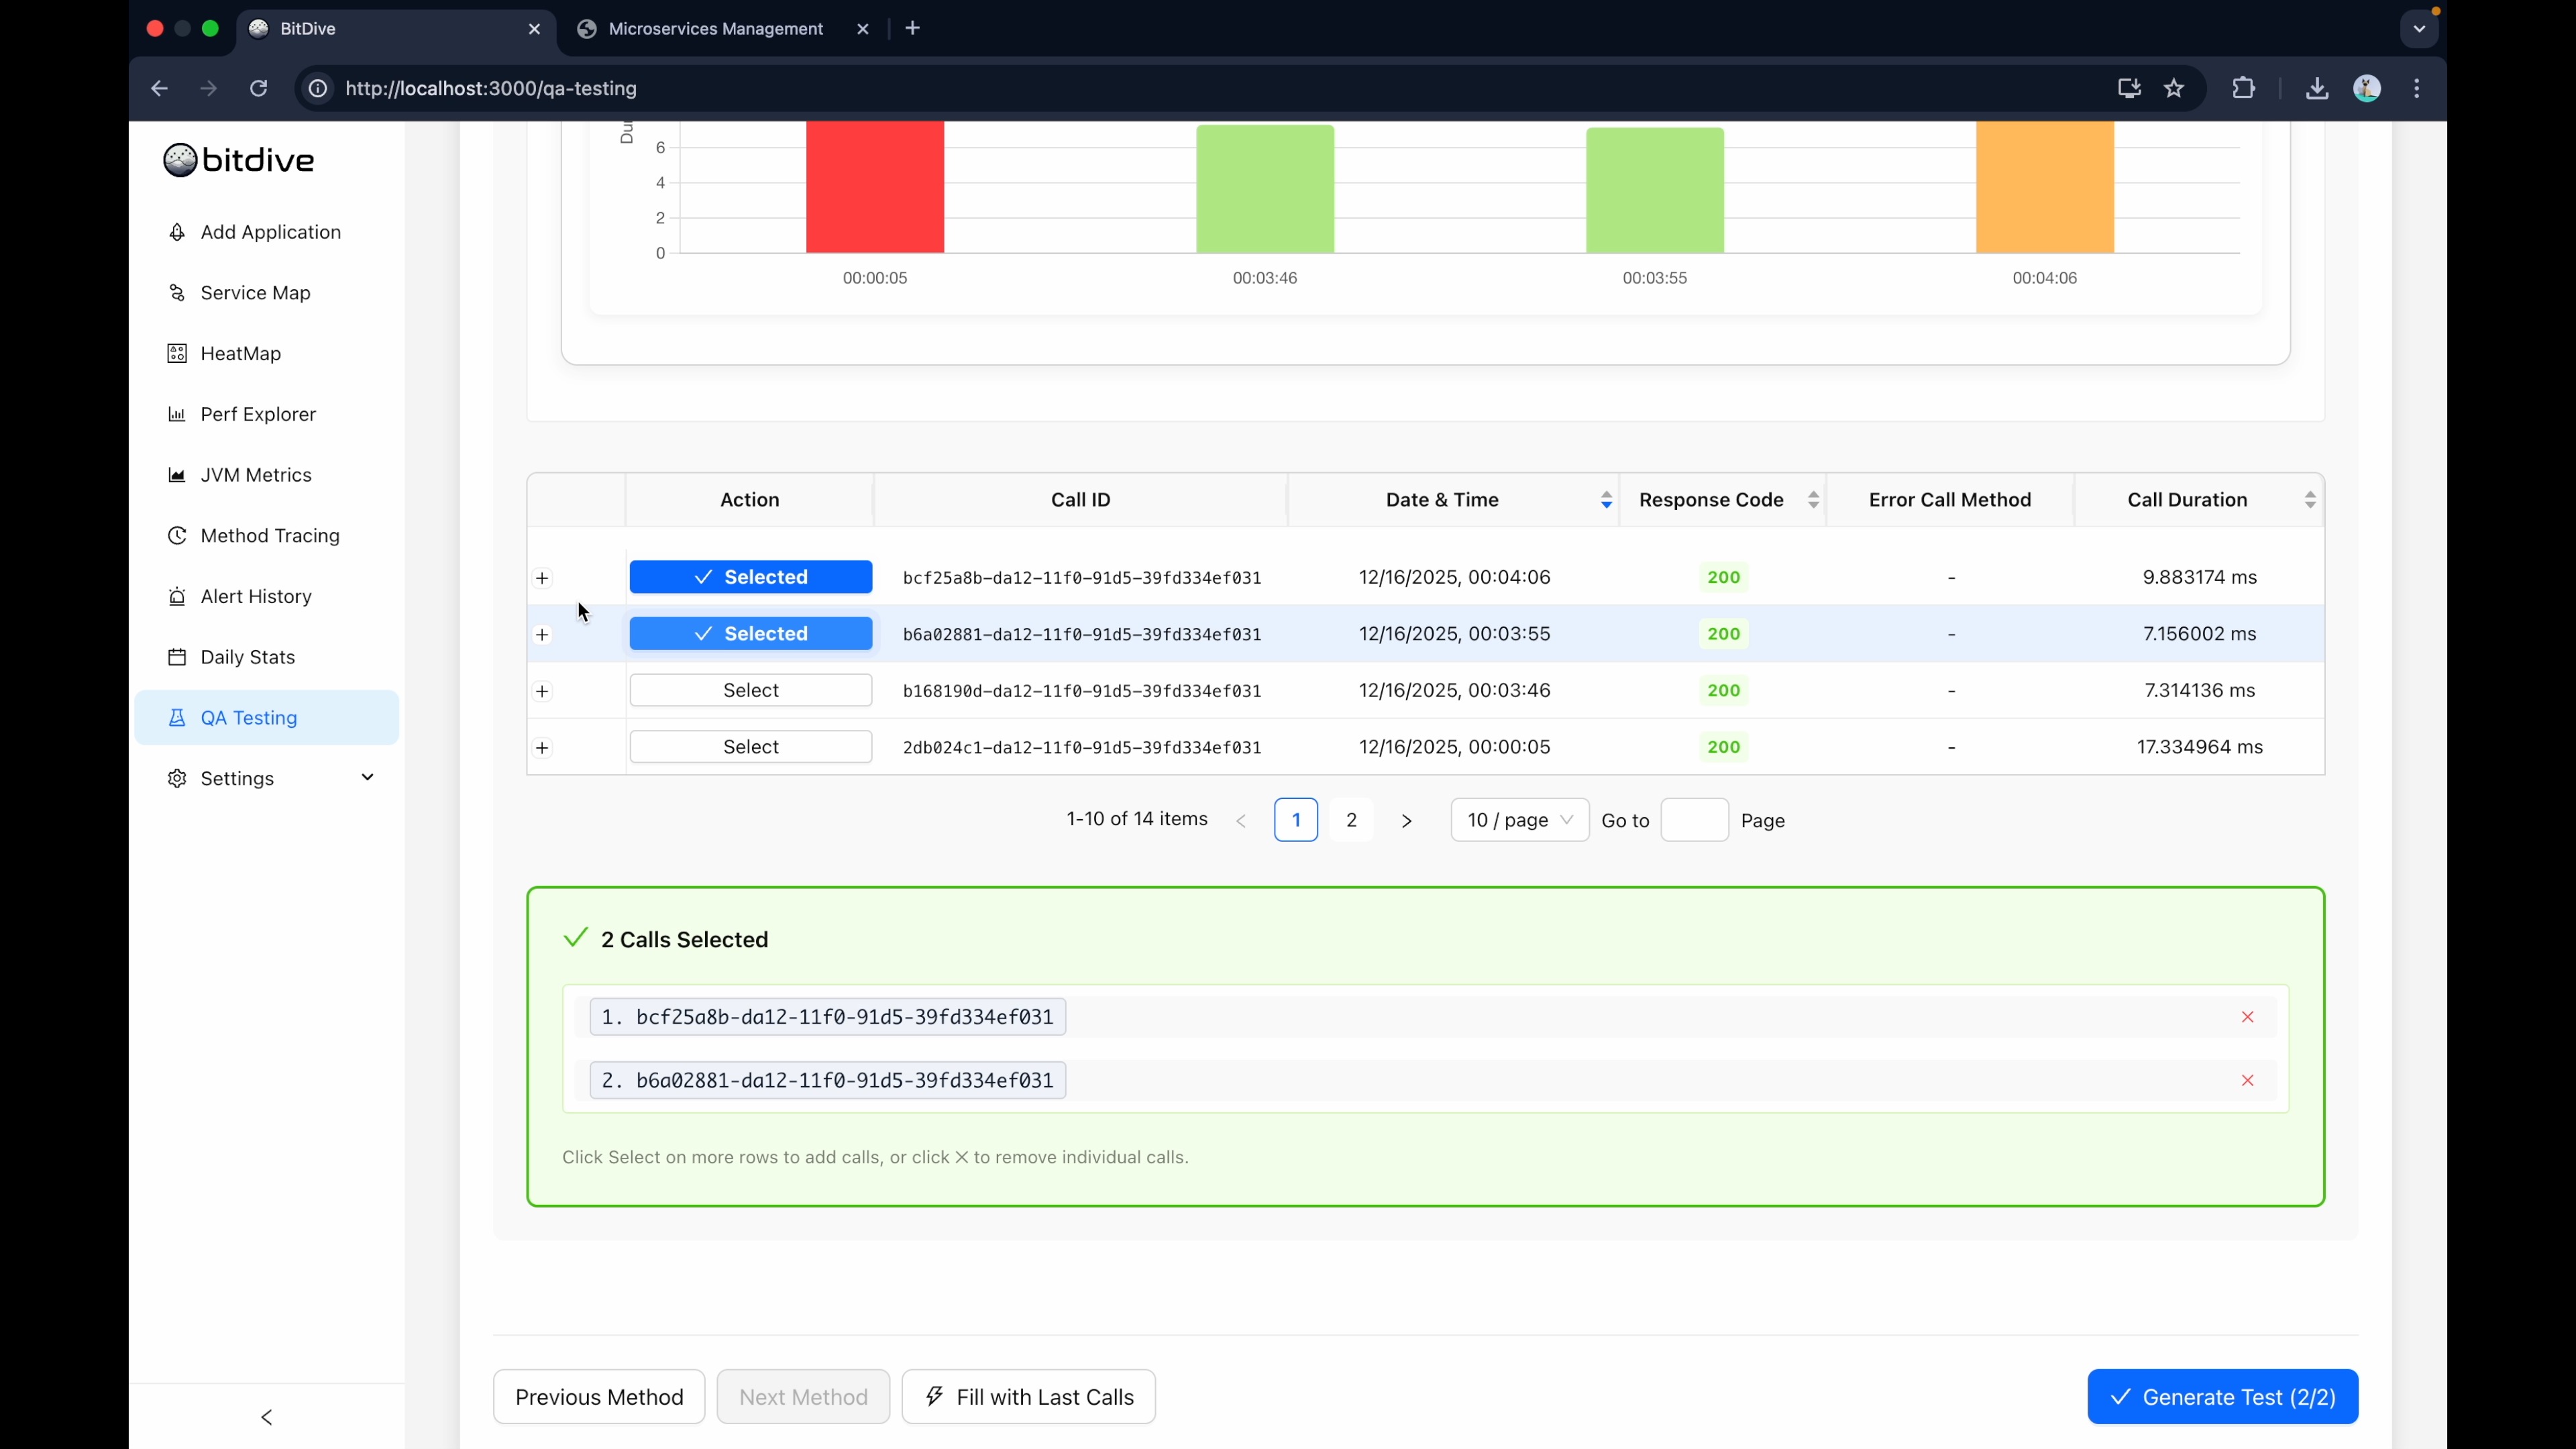
You will see a list of recent operations available for automation. Select the ones that represent critical business logic.
- Professional Tip: Include captured error scenarios (e.g., 500 or 400 responses). Converting a bug reproduction into a permanent regression test is the precise workflow for preventing recurring issues.
- Handling Noise: If a trace contains unstable values like timestamps or random UUIDs, BitDive can automatically mask them using Smart Noise Reduction policies configured in the Configuration Guide.
Step 4: Inspect and Finalize
Before you create, you have one last chance to inspect the details. Click on a trace to see the Input Arguments and Return Values.
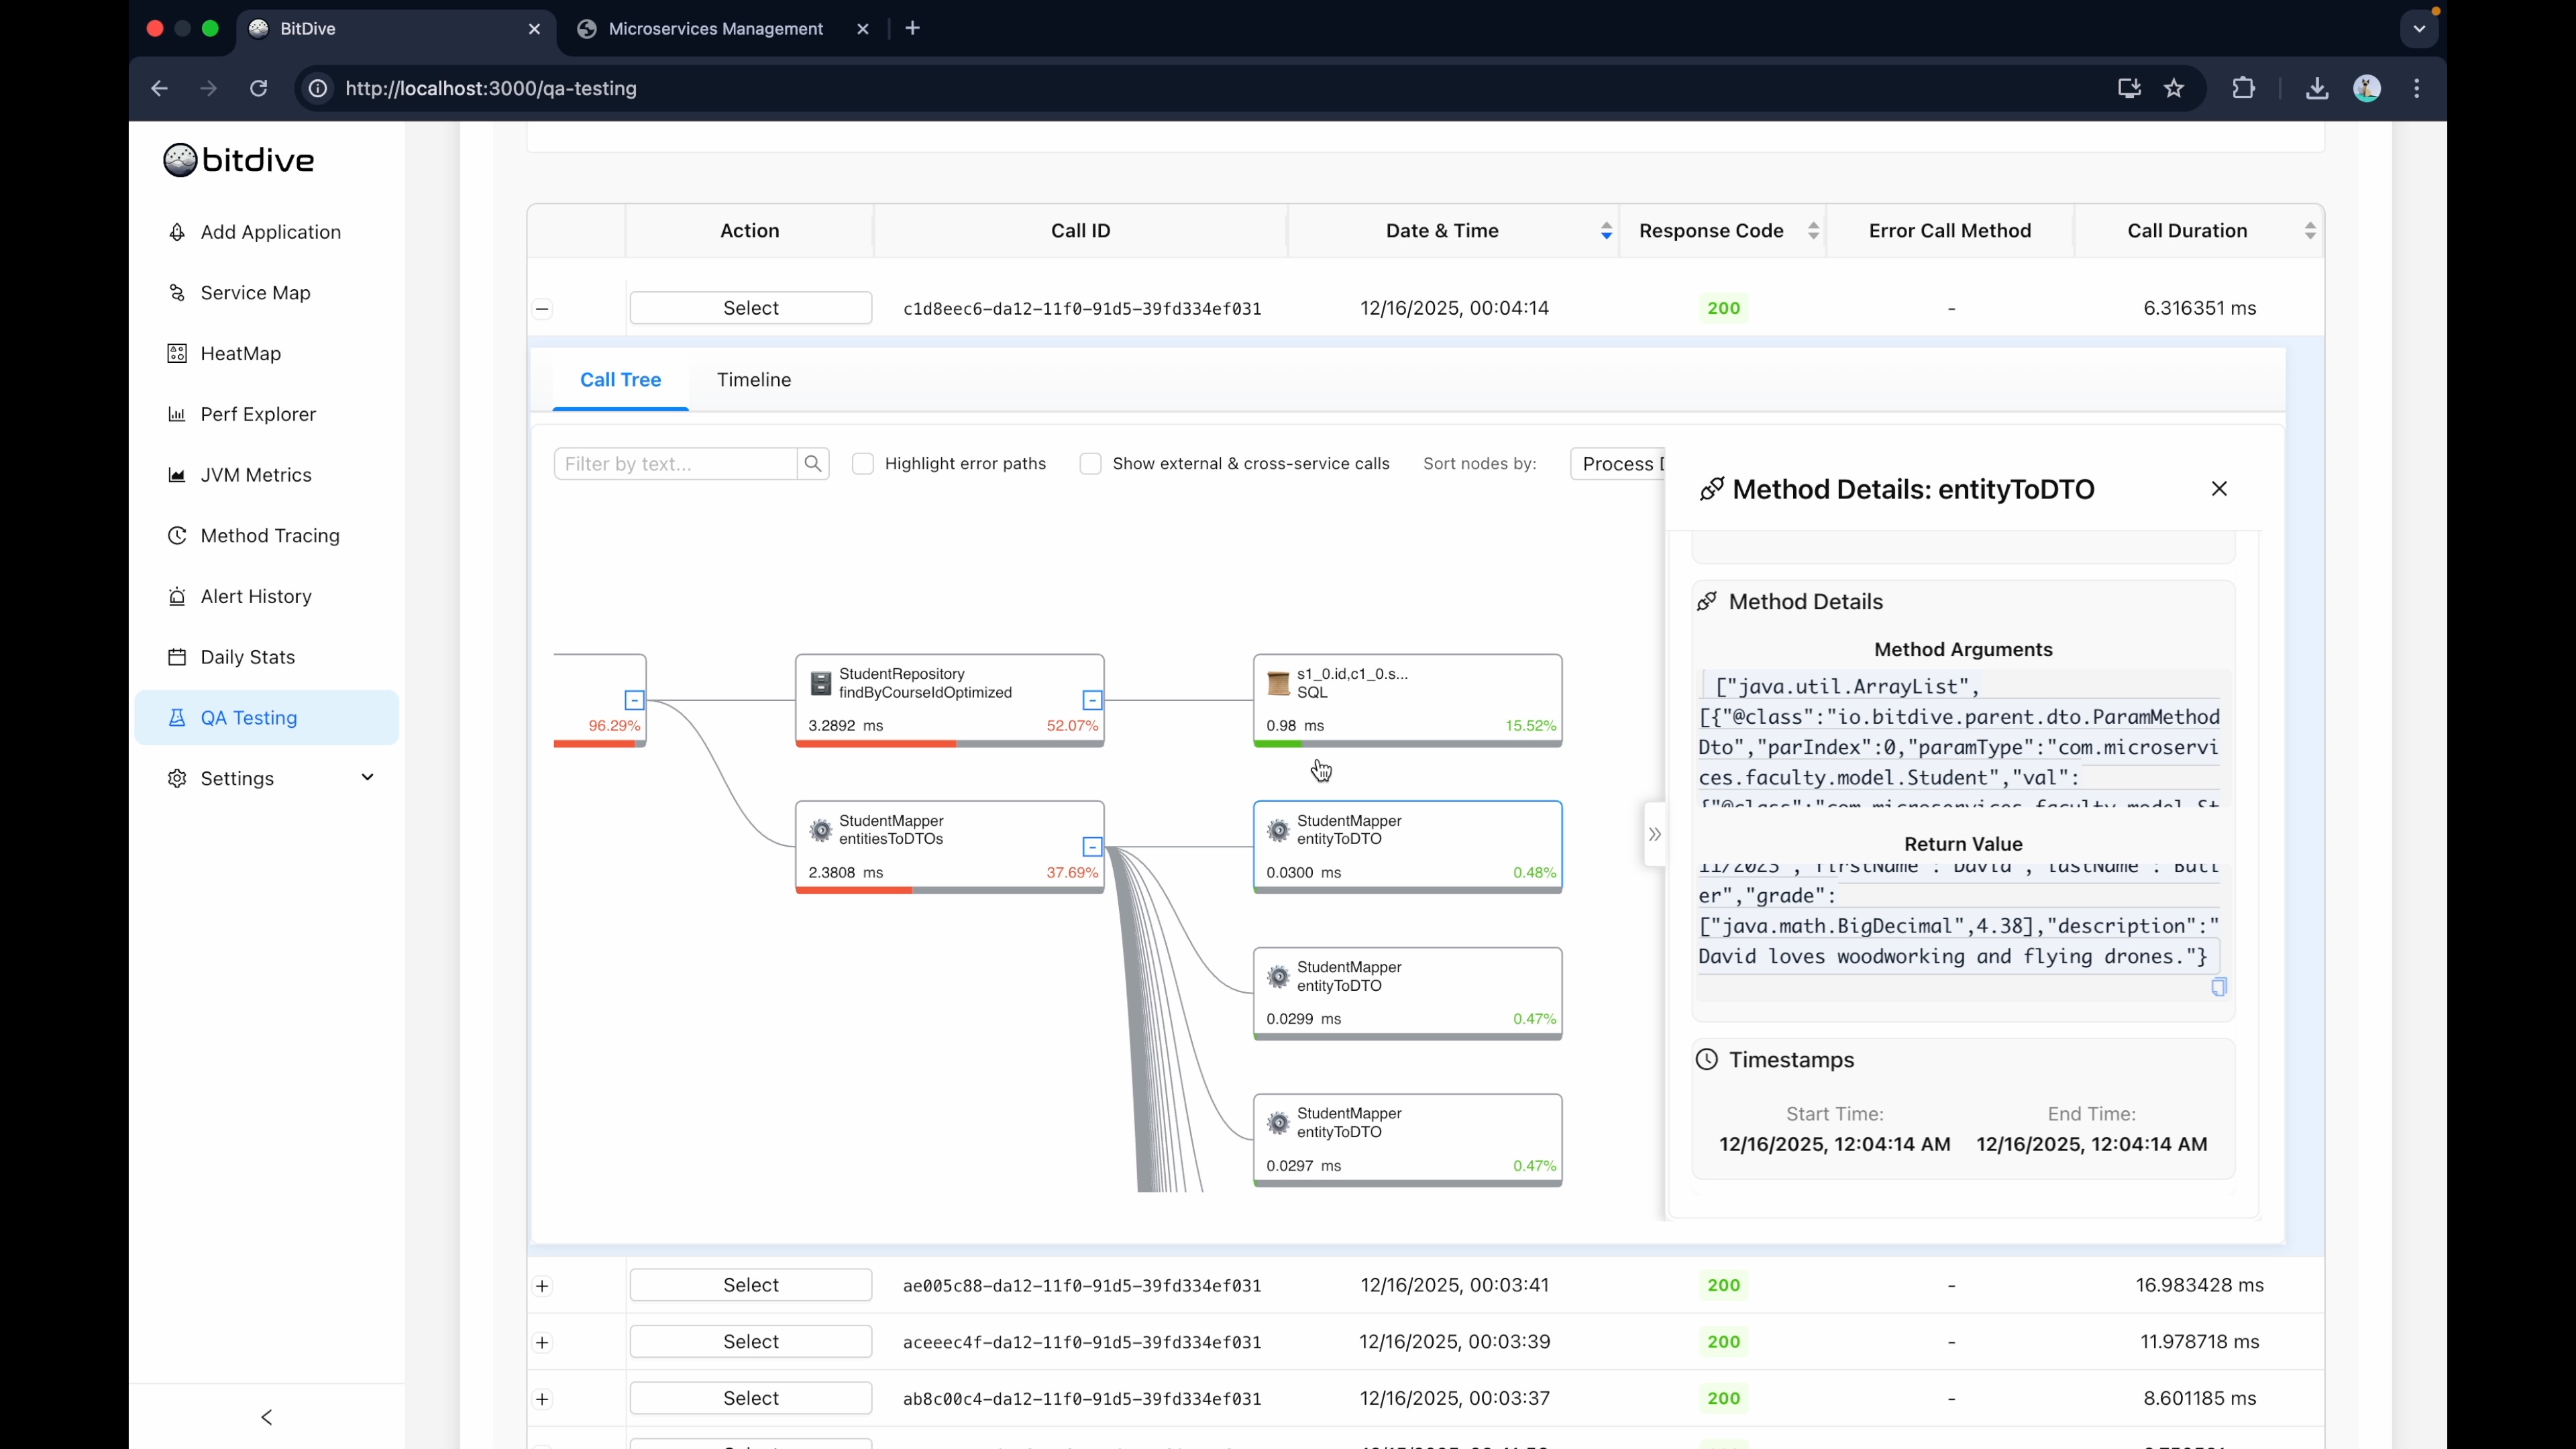
You can check deep into the call stack. For example, if you're testing a TeacherService, you can see exactly what DTO object was passed to it. This visibility ensures you aren't just validating the HTTP endpoint, but the actual internal service logic, effectively performing integration testing without the overhead.
Once satisfied, confirms your selection to Create the test plan.
Step 5: Execute with Standard JUnit Tooling
This is where the workflow enables standard CI/CD integration. You don't need a proprietary runner or a special server to run these tests. They are executed as standard JUnit tests.
- Copy the Test ID from BitDive.
- Open your IDE (IntelliJ, Eclipse, VS Code).
- Add the ID to your project's JUnit test harness.
Now, execute it like any other Java test:
mvn test

You'll likely see a high number of assertions (e.g., "116 tests run"). This is because BitDive is validating every method in the chain, not just the final result.
Since these are standard JUnit tests, you can set breakpoints, inspect variables, and step through the replay. BitDive provides the exact context of the recorded failure, making it significantly faster to debug than typical integration tests involving complex database setups.
Debugging with Replay: Step-by-Step
- Fail the Test: Run
mvn testand identify a failure inOrderService. - Attach Debugger: In IntelliJ or VS Code, run the specific BitDive test in Debug Mode.
- Inspect Recorded Data: As the code executes, BitDive will return the recorded responses from dependencies (DBs, APIs). You can see exactly why the logic branched differently than expected.
- Fix and Re-run: Update your code and run the test again. If it passes, your logic now matches the recorded reality.
Results
You have now established a robust, full-stack Trace-Driven regression suite with Deterministic Replay. By replacing manual Mockito definitions with captured production data, you have eliminated the primary maintenance burden of unit testing while providing a safe foundation for AI-assisted development.
Integration Testing Guide - Test full Spring contexts with auto-stubbed boundaries via Replay mode.
Testcontainers Integration Testing - Real database via Testcontainers with external APIs replayed from traces.
BitDive vs. Diffblue - Understand how runtime-recorded tests compare to AI-generated static tests.
CI/CD Integration Guide - Automate your regression suite for every pull request.