Trace-Based Java Testing: Deterministic Verification without Mocks

Real Runtime Data is the Ultimate Source of Truth. Writing unit tests manually is a losing battle against technical debt. BitDive captures the actual execution of your code and transforms it into Deterministic Verification suites, eliminating the need for manual mocking and giving you the Real Runtime Data required for AI-native development.
The Problem with Traditional Test Automation
Modern test automation has a hidden cost. Tools like Cypress, Playwright, and Mockito require QA engineers and developers to be full-time test maintainers. Even if AI writes the initial code, someone must review it, debug it, and fix it after every refactoring. The test framework becomes a "second product" that consumes resources.
Sure, you can use AI to create hundreds of tests in seconds. But then what? You're stuck debugging flaky tests, fixing brittle assertions, and updating mocks every time your API changes. AI-generated tests are probabilistic, they are guesses based on static code, often missing the nuance of production data.
Even worse, traditional tests operate in a vacuum. They mock databases with "happy path" data and simulate services based on outdated assumptions. When they fail, you're left hunting through logs, attempting to reconstruct what happened.
A Different Approach: Trace-Based Testing
BitDive replaces manual test writing and AI guessing with a Trace-Based Testing process that creates robust unit and integration tests:
- Capture: Record the actual execution of key scenarios inside your service (from production or test environments).
- Replay: Turn these recordings into standard JUnit 5 tests that act as a regression baseline.
The key difference? BitDive doesn't guess what your code should do. It records what it actually did and verifies that behavior remains consistent. This is Deterministic Testing.
How It Works: Creating a Test from a Trace
Let's walk through the process using a real demo application.
The Setup
The process is simple: use your application naturally, and BitDive captures everything. In our walkthrough video, we use a sample Spring Boot microservices application (Faculty, Report, and OpenAI services with Kafka and PostgreSQL), but the approach works for any Java application.
Step 1: Capture Execution
Open your application and perform typical operations. BitDive runs in the background, capturing the full execution context: method calls, SQL queries, dependency interactions, and API responses.
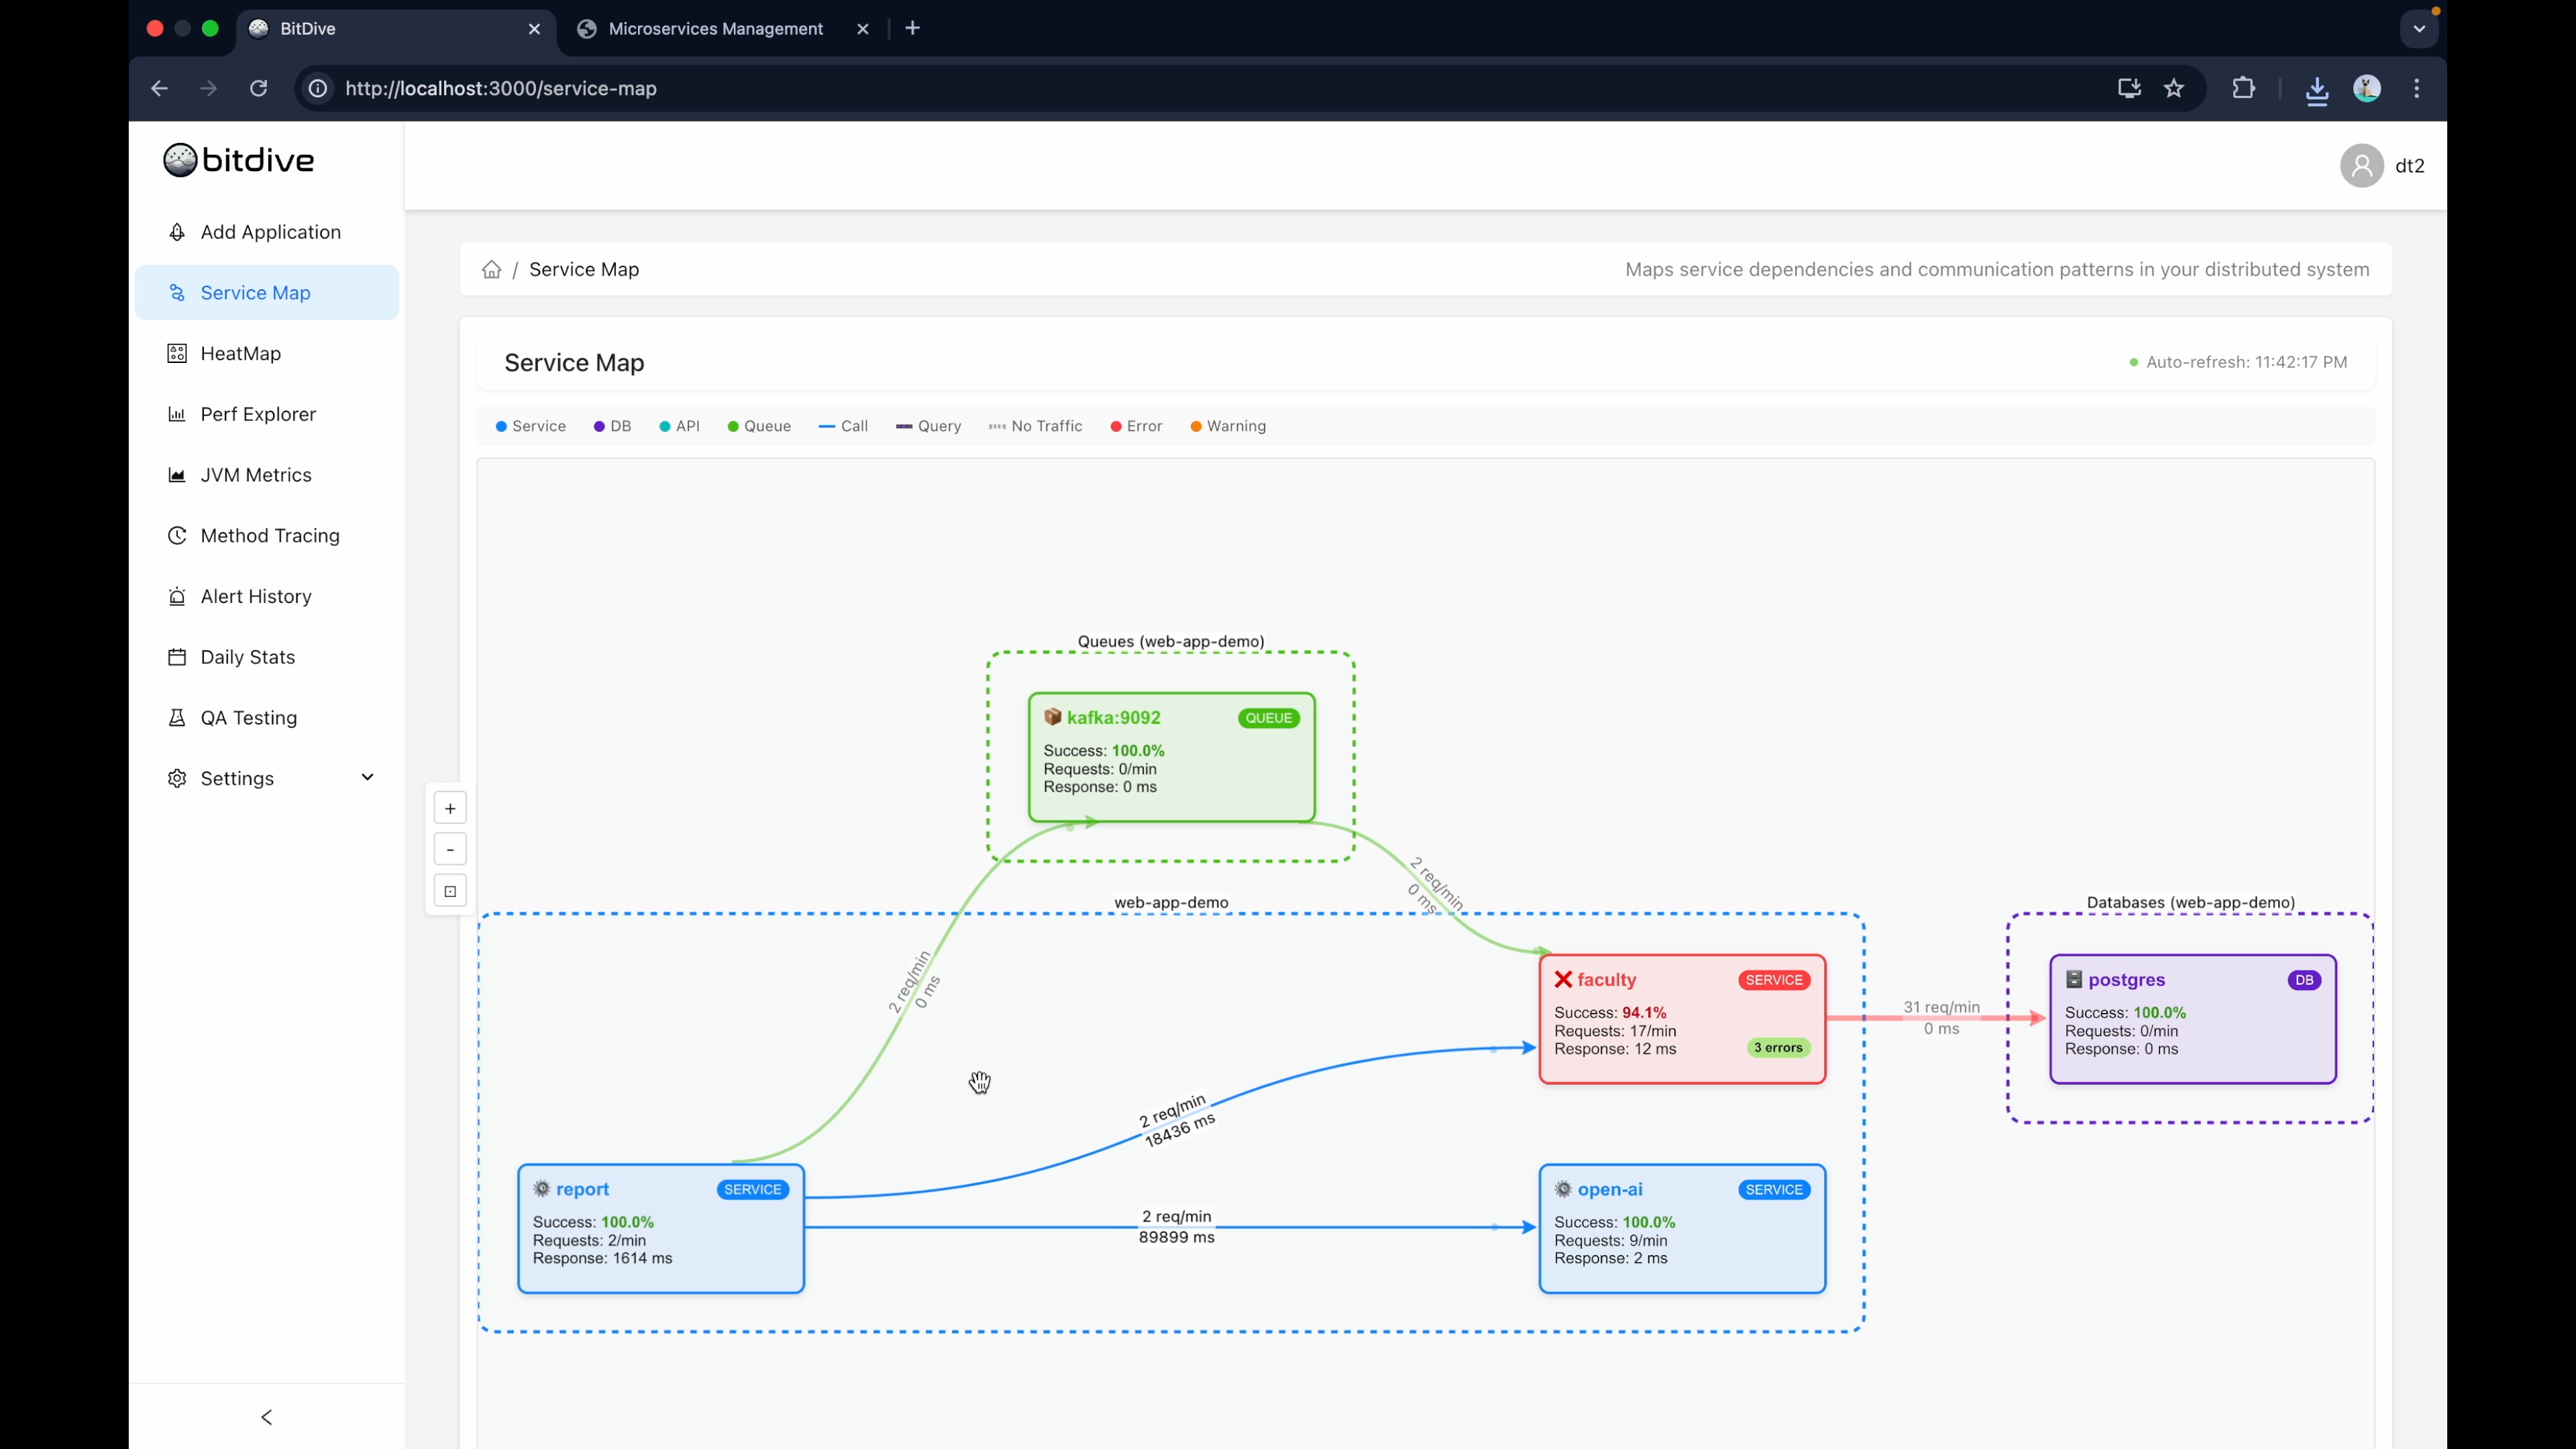
After using the application, open the BitDive workspace. You'll see all microservices that participated in your actions, along with infrastructure dependencies like databases and message brokers.
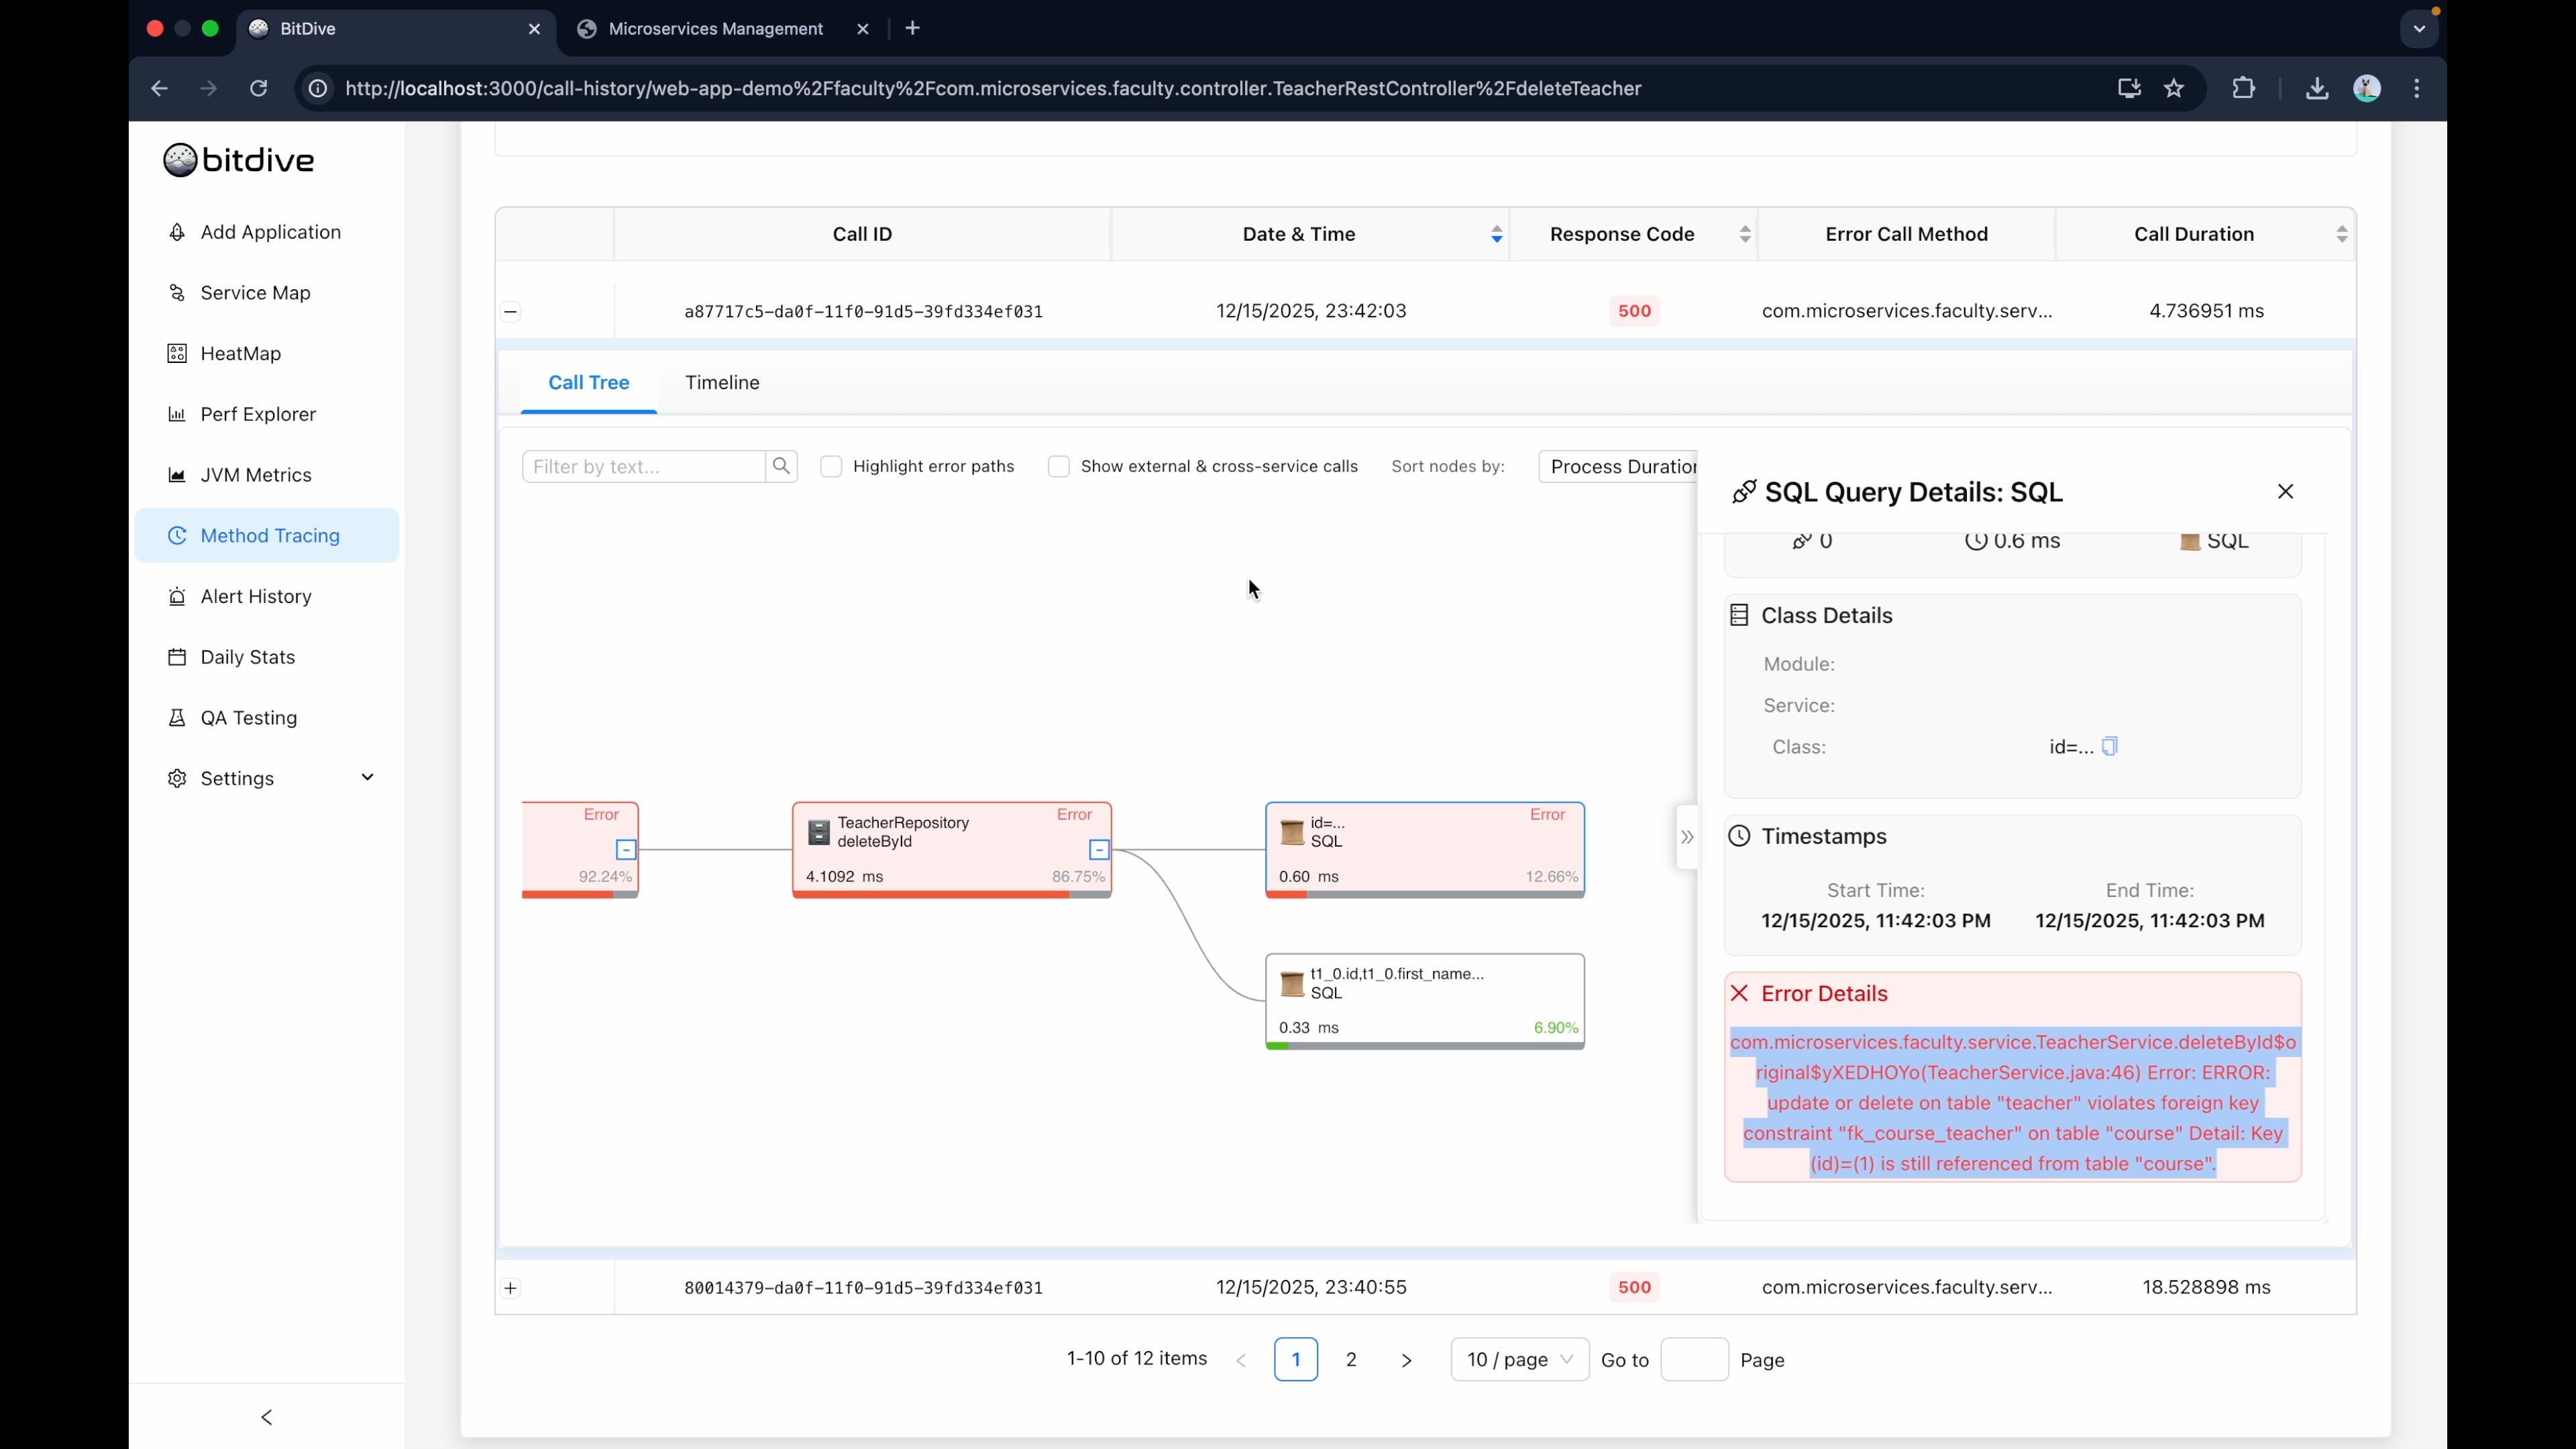
Step 2: Debug Failures (Optional)
When something fails, you get immediate debugging insight. For example, if an operation returns a 500 error, open that call in the HeatMap and drill down to the exact method and SQL query that caused it. This is Runtime Observability, seeing the code execute method-by-method.
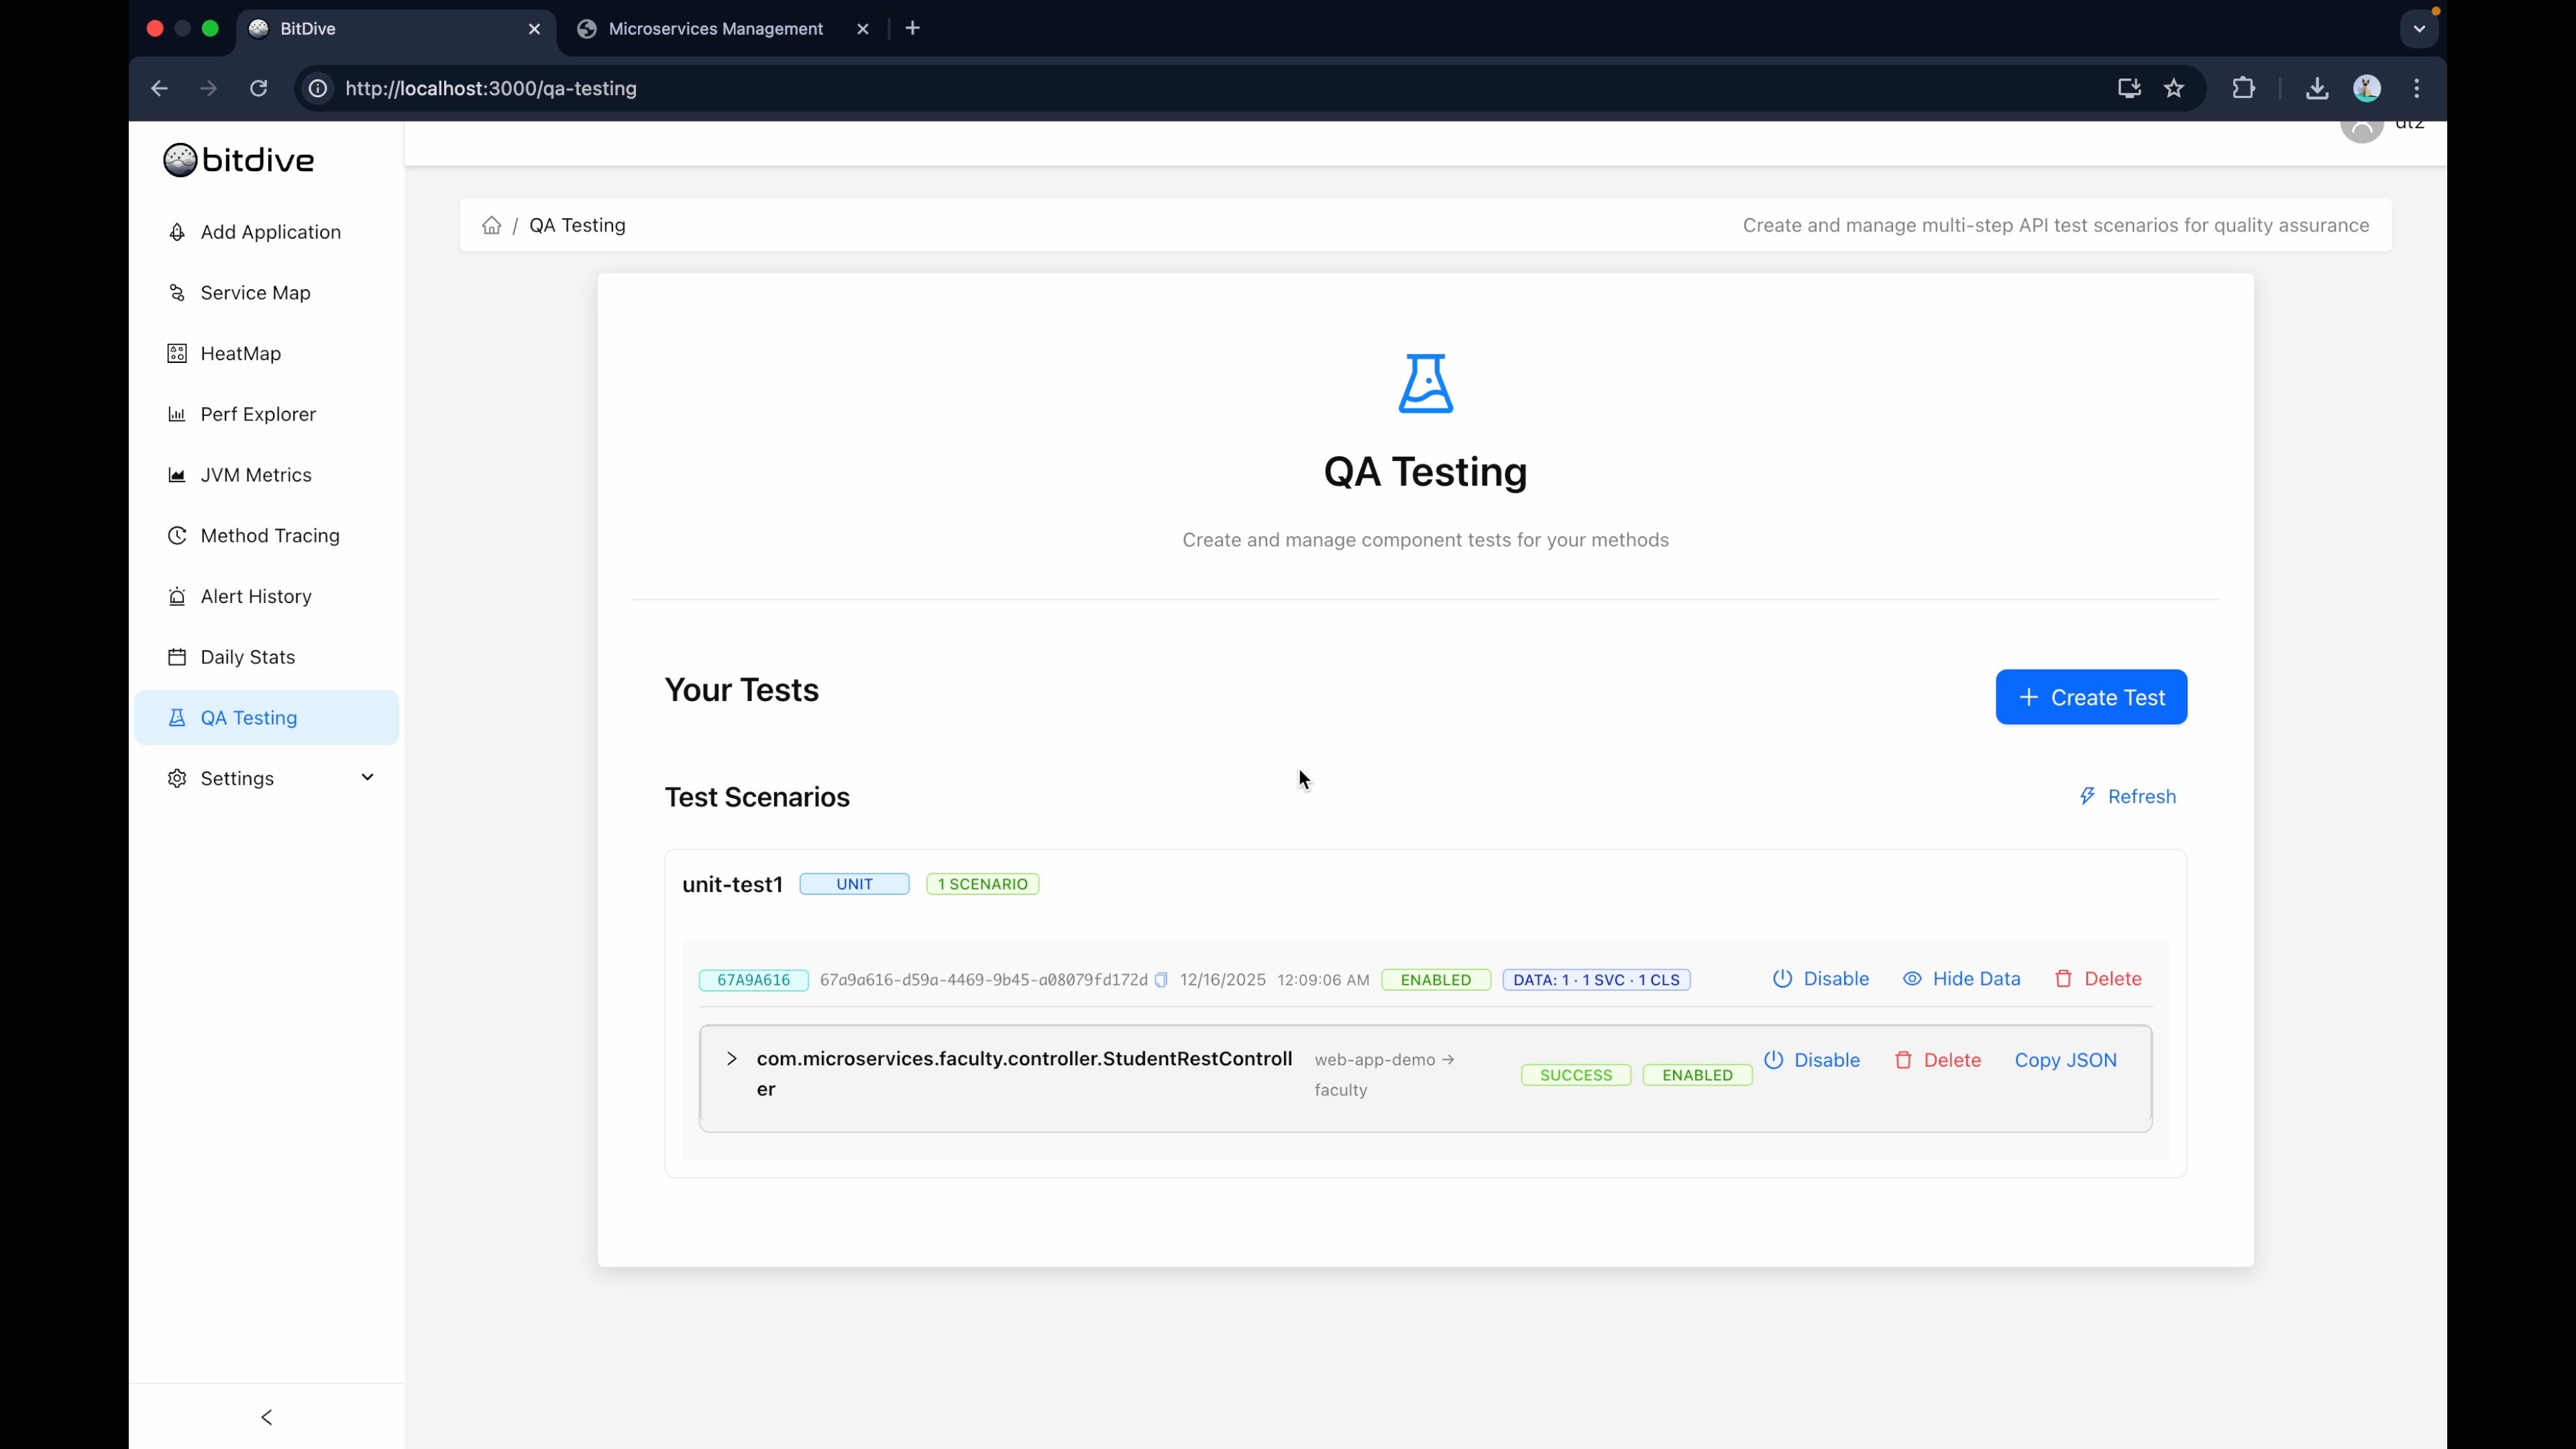
Step 3: Select Operations for Testing
Go to the Testing tab and create a new test. Select the operations you want to preserve as regression tests. Complex calls like "GetStudentsForCourseReport" make excellent candidates because they exercise deep call chains and multiple dependencies.
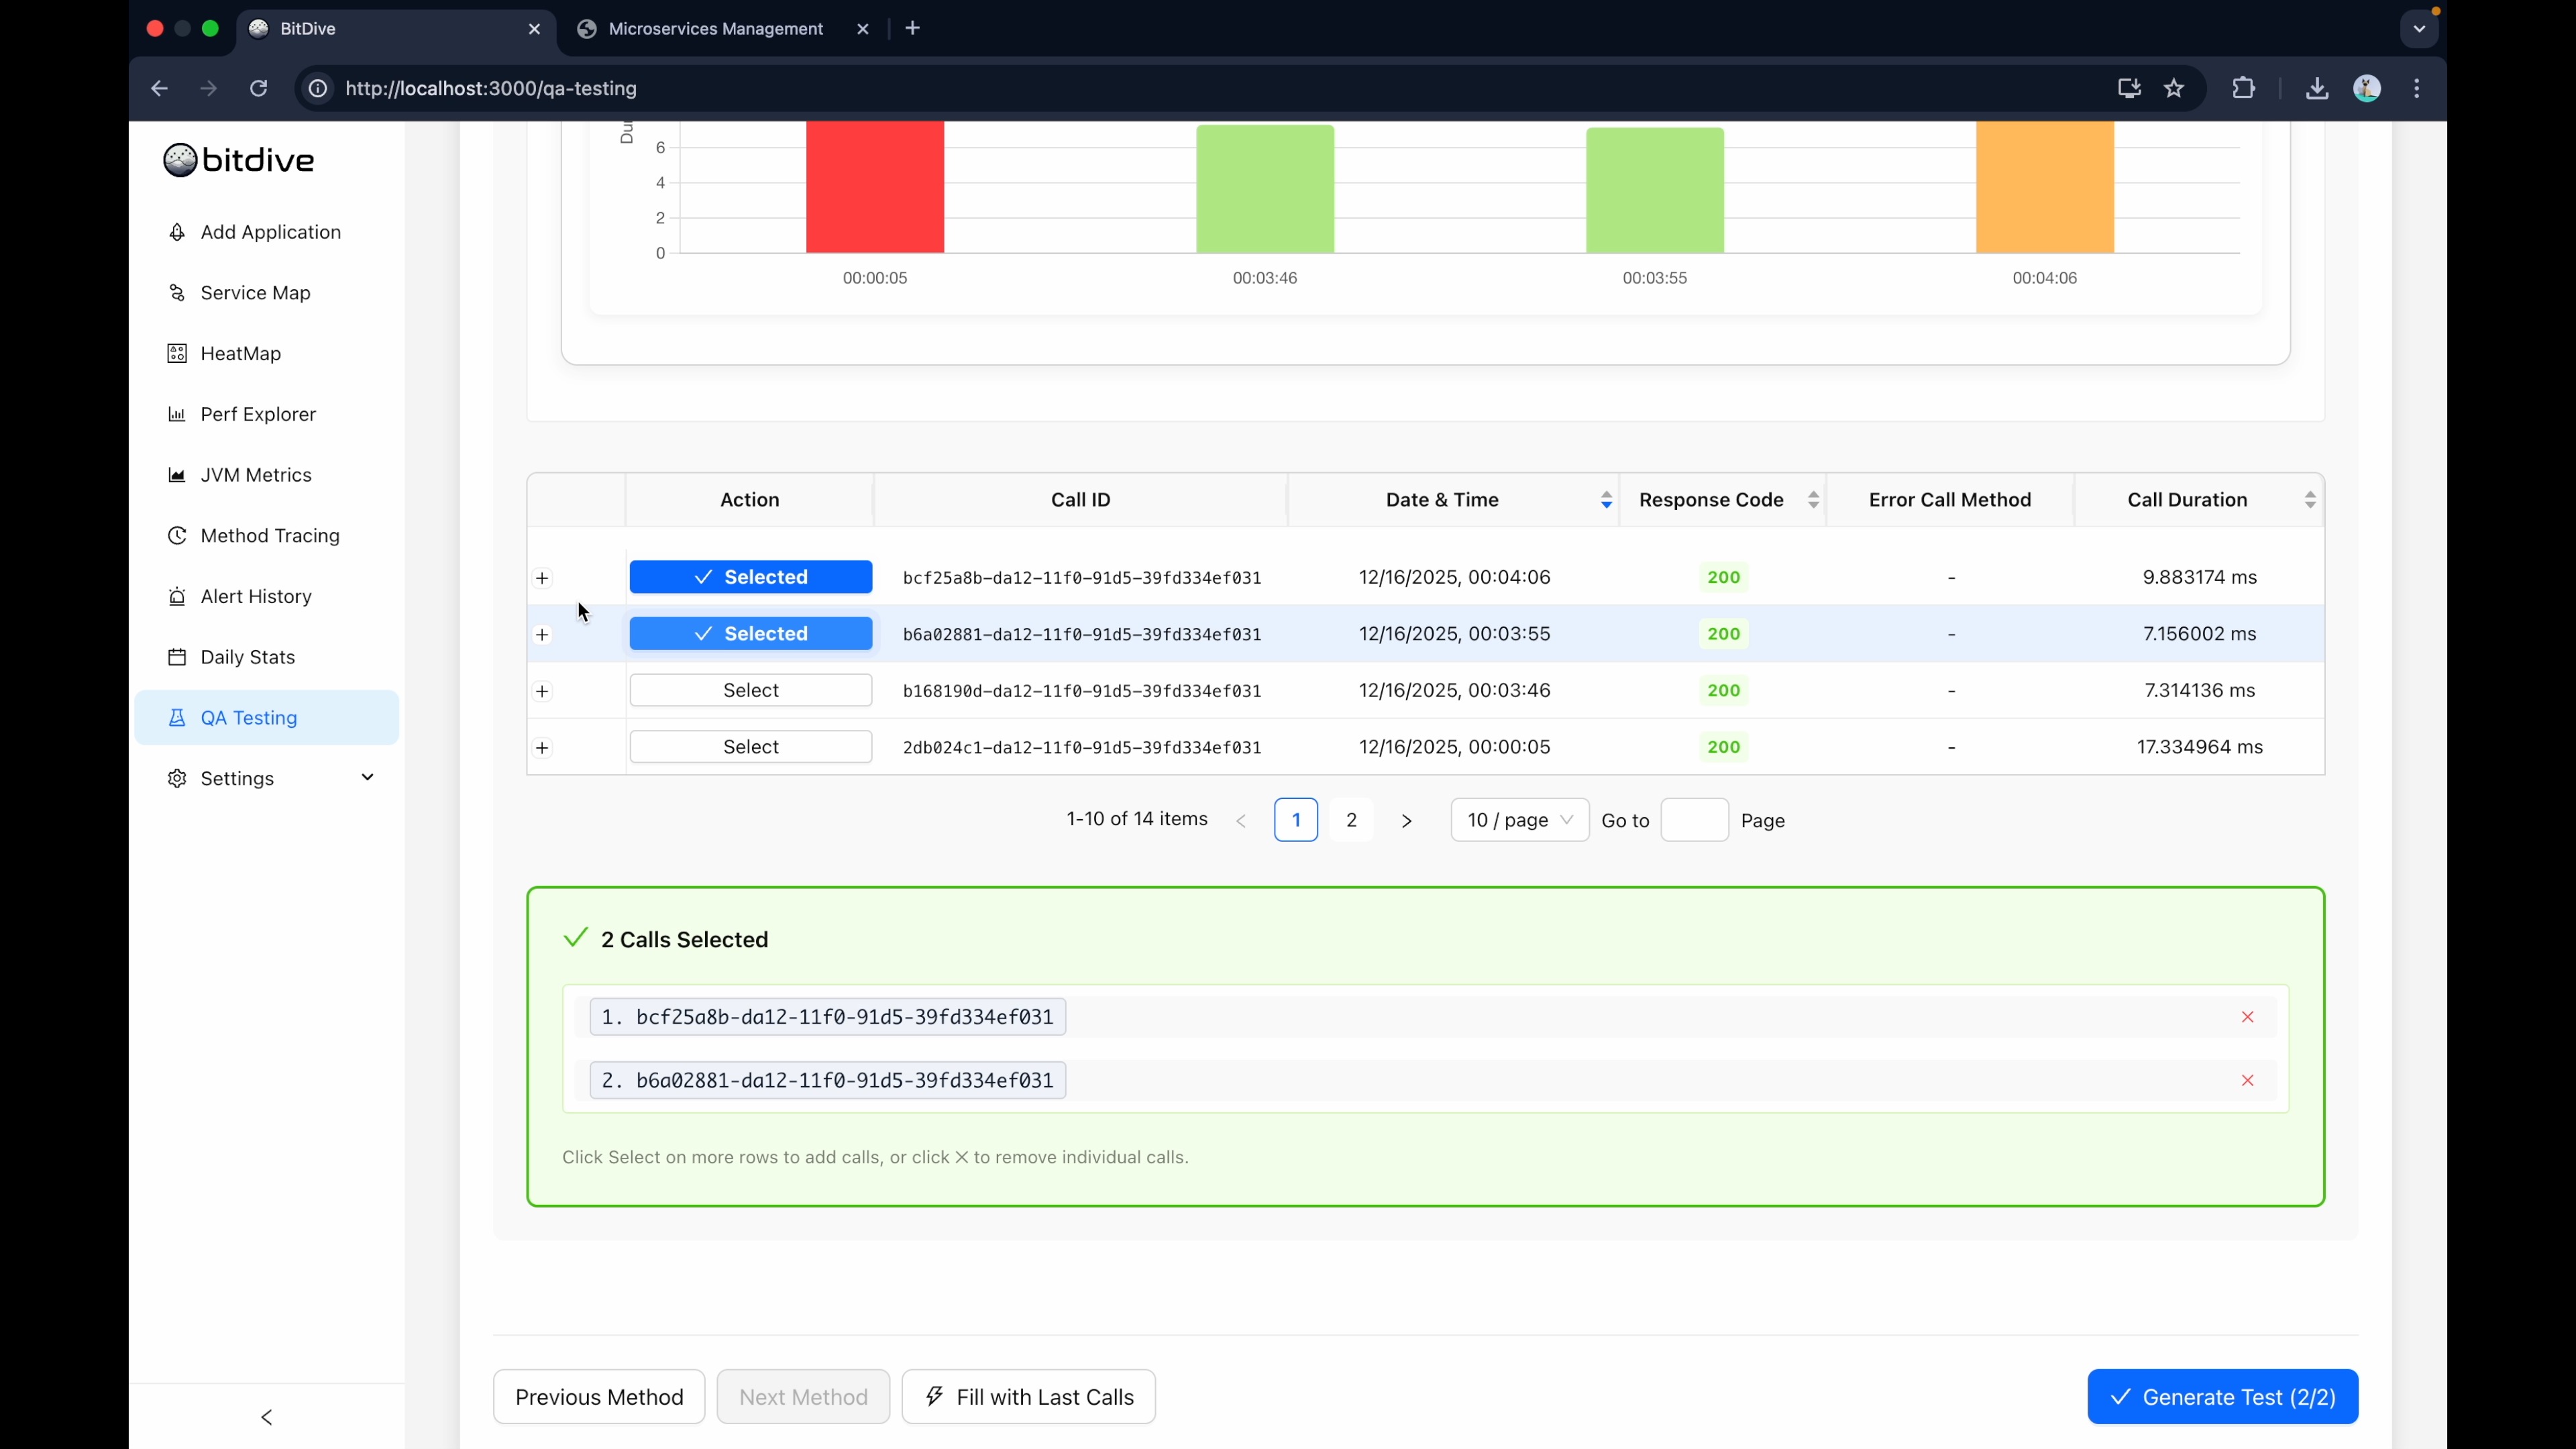
Step 4: Inspect Execution Details
For each operation, choose the specific recorded trace. You can inspect it in detail: input arguments, return values, DTOs passed between services, and SQL queries executed against the database.
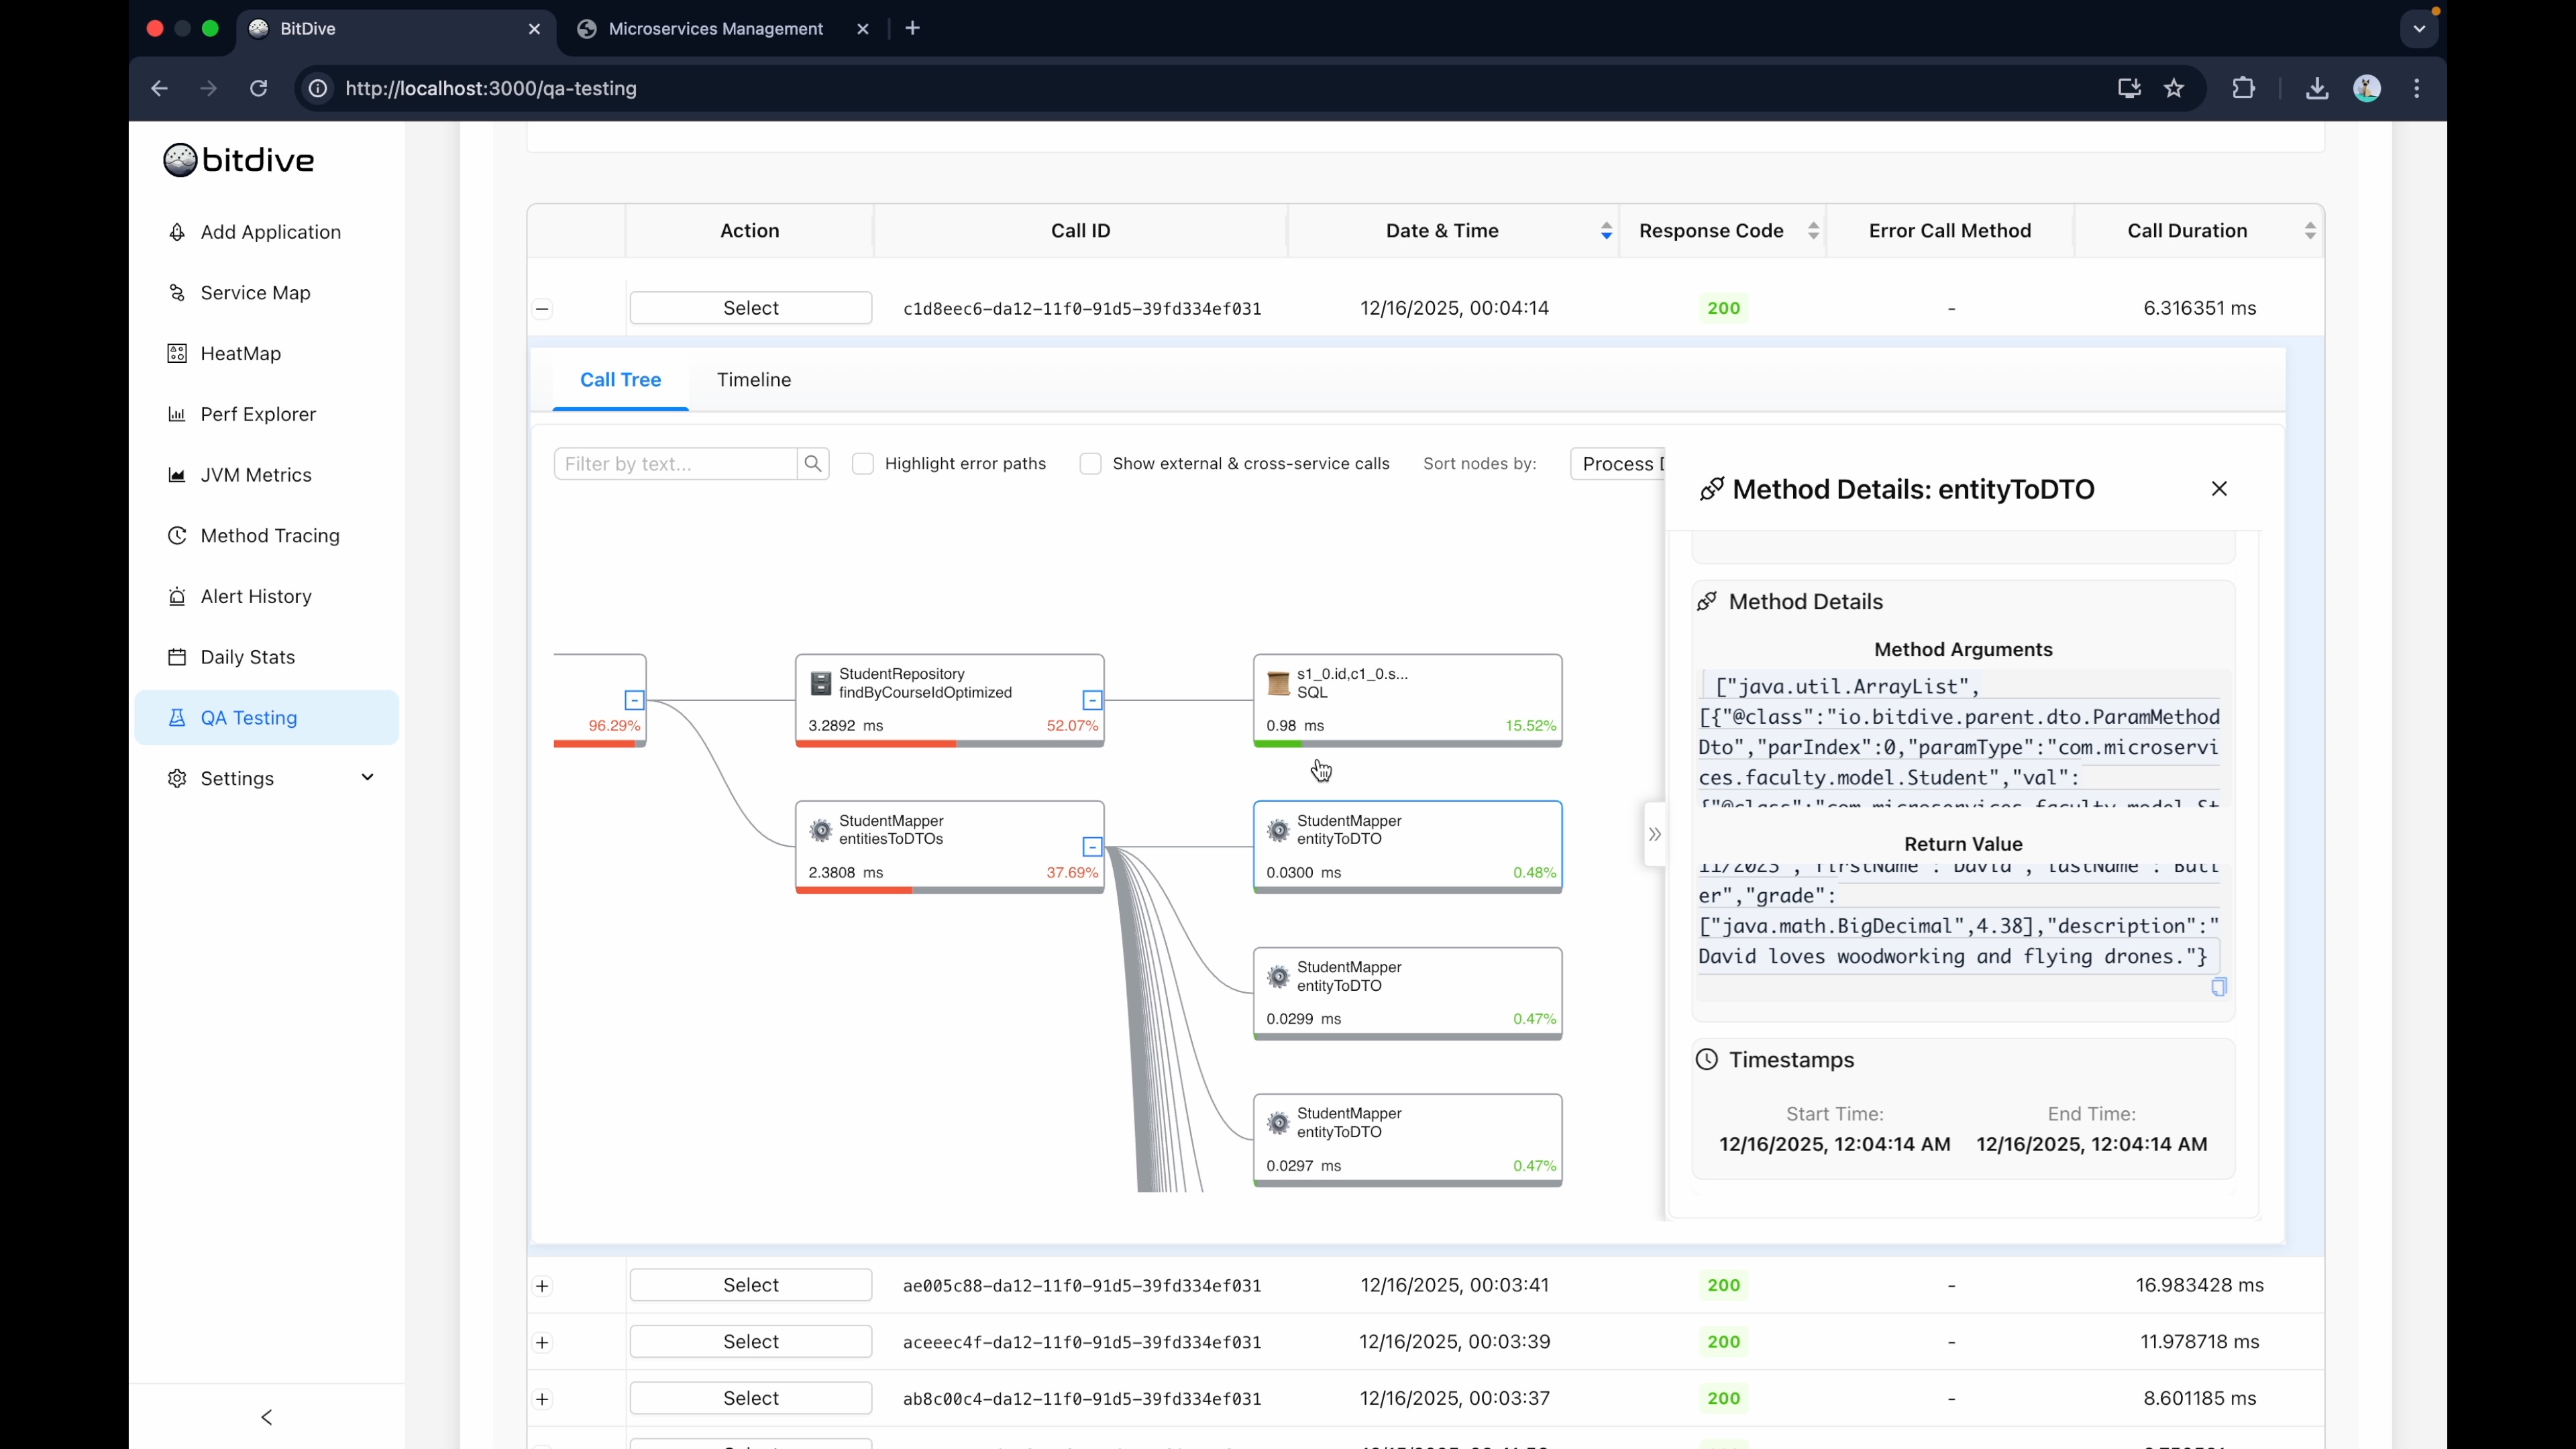
This transparency lets you verify you're capturing the right baseline behavior before validating it.
Step 5: Create the JUnit Test
Once you've selected your traces, click "Create Test". BitDive packages the recorded execution into a JSON Replay Plan with exact inputs, exact outputs, and exact dependency interactions.

Crucially, BitDive automatically virtualizes the environment. When the code tries to hit the database during replay, BitDive intercepts the call and returns the recorded response. This effectively "auto-mocks" your dependencies using real data.
The End of Manual Mocking? Why Recorded Data Wins
Manual mocking (like Mockito) is a "best guess" of dependency behavior. It often leads to tests that pass in CI but fail in production because the mock didn't account for real-world database constraints or API edge cases.
BitDive solves this with Real Runtime Data:
- No Manual Mocks: BitDive records the actual response from PostgreSQL, Kafka, or S3.
- Full Trace Integrity: The validation includes the SQL statement, the parameters, and the exact sequence of calls.
- Zero Drift: As your production data changes, you simply recapture the trace to update the test.
Step 6: Run as Standard Java Unit Tests
Copy the test identifier and paste it into your IDE's JUnit configuration. Then run:
mvn test

A single complex operation might create many individual validation checks because BitDive verifies behavior across the entire call chain, method by method.
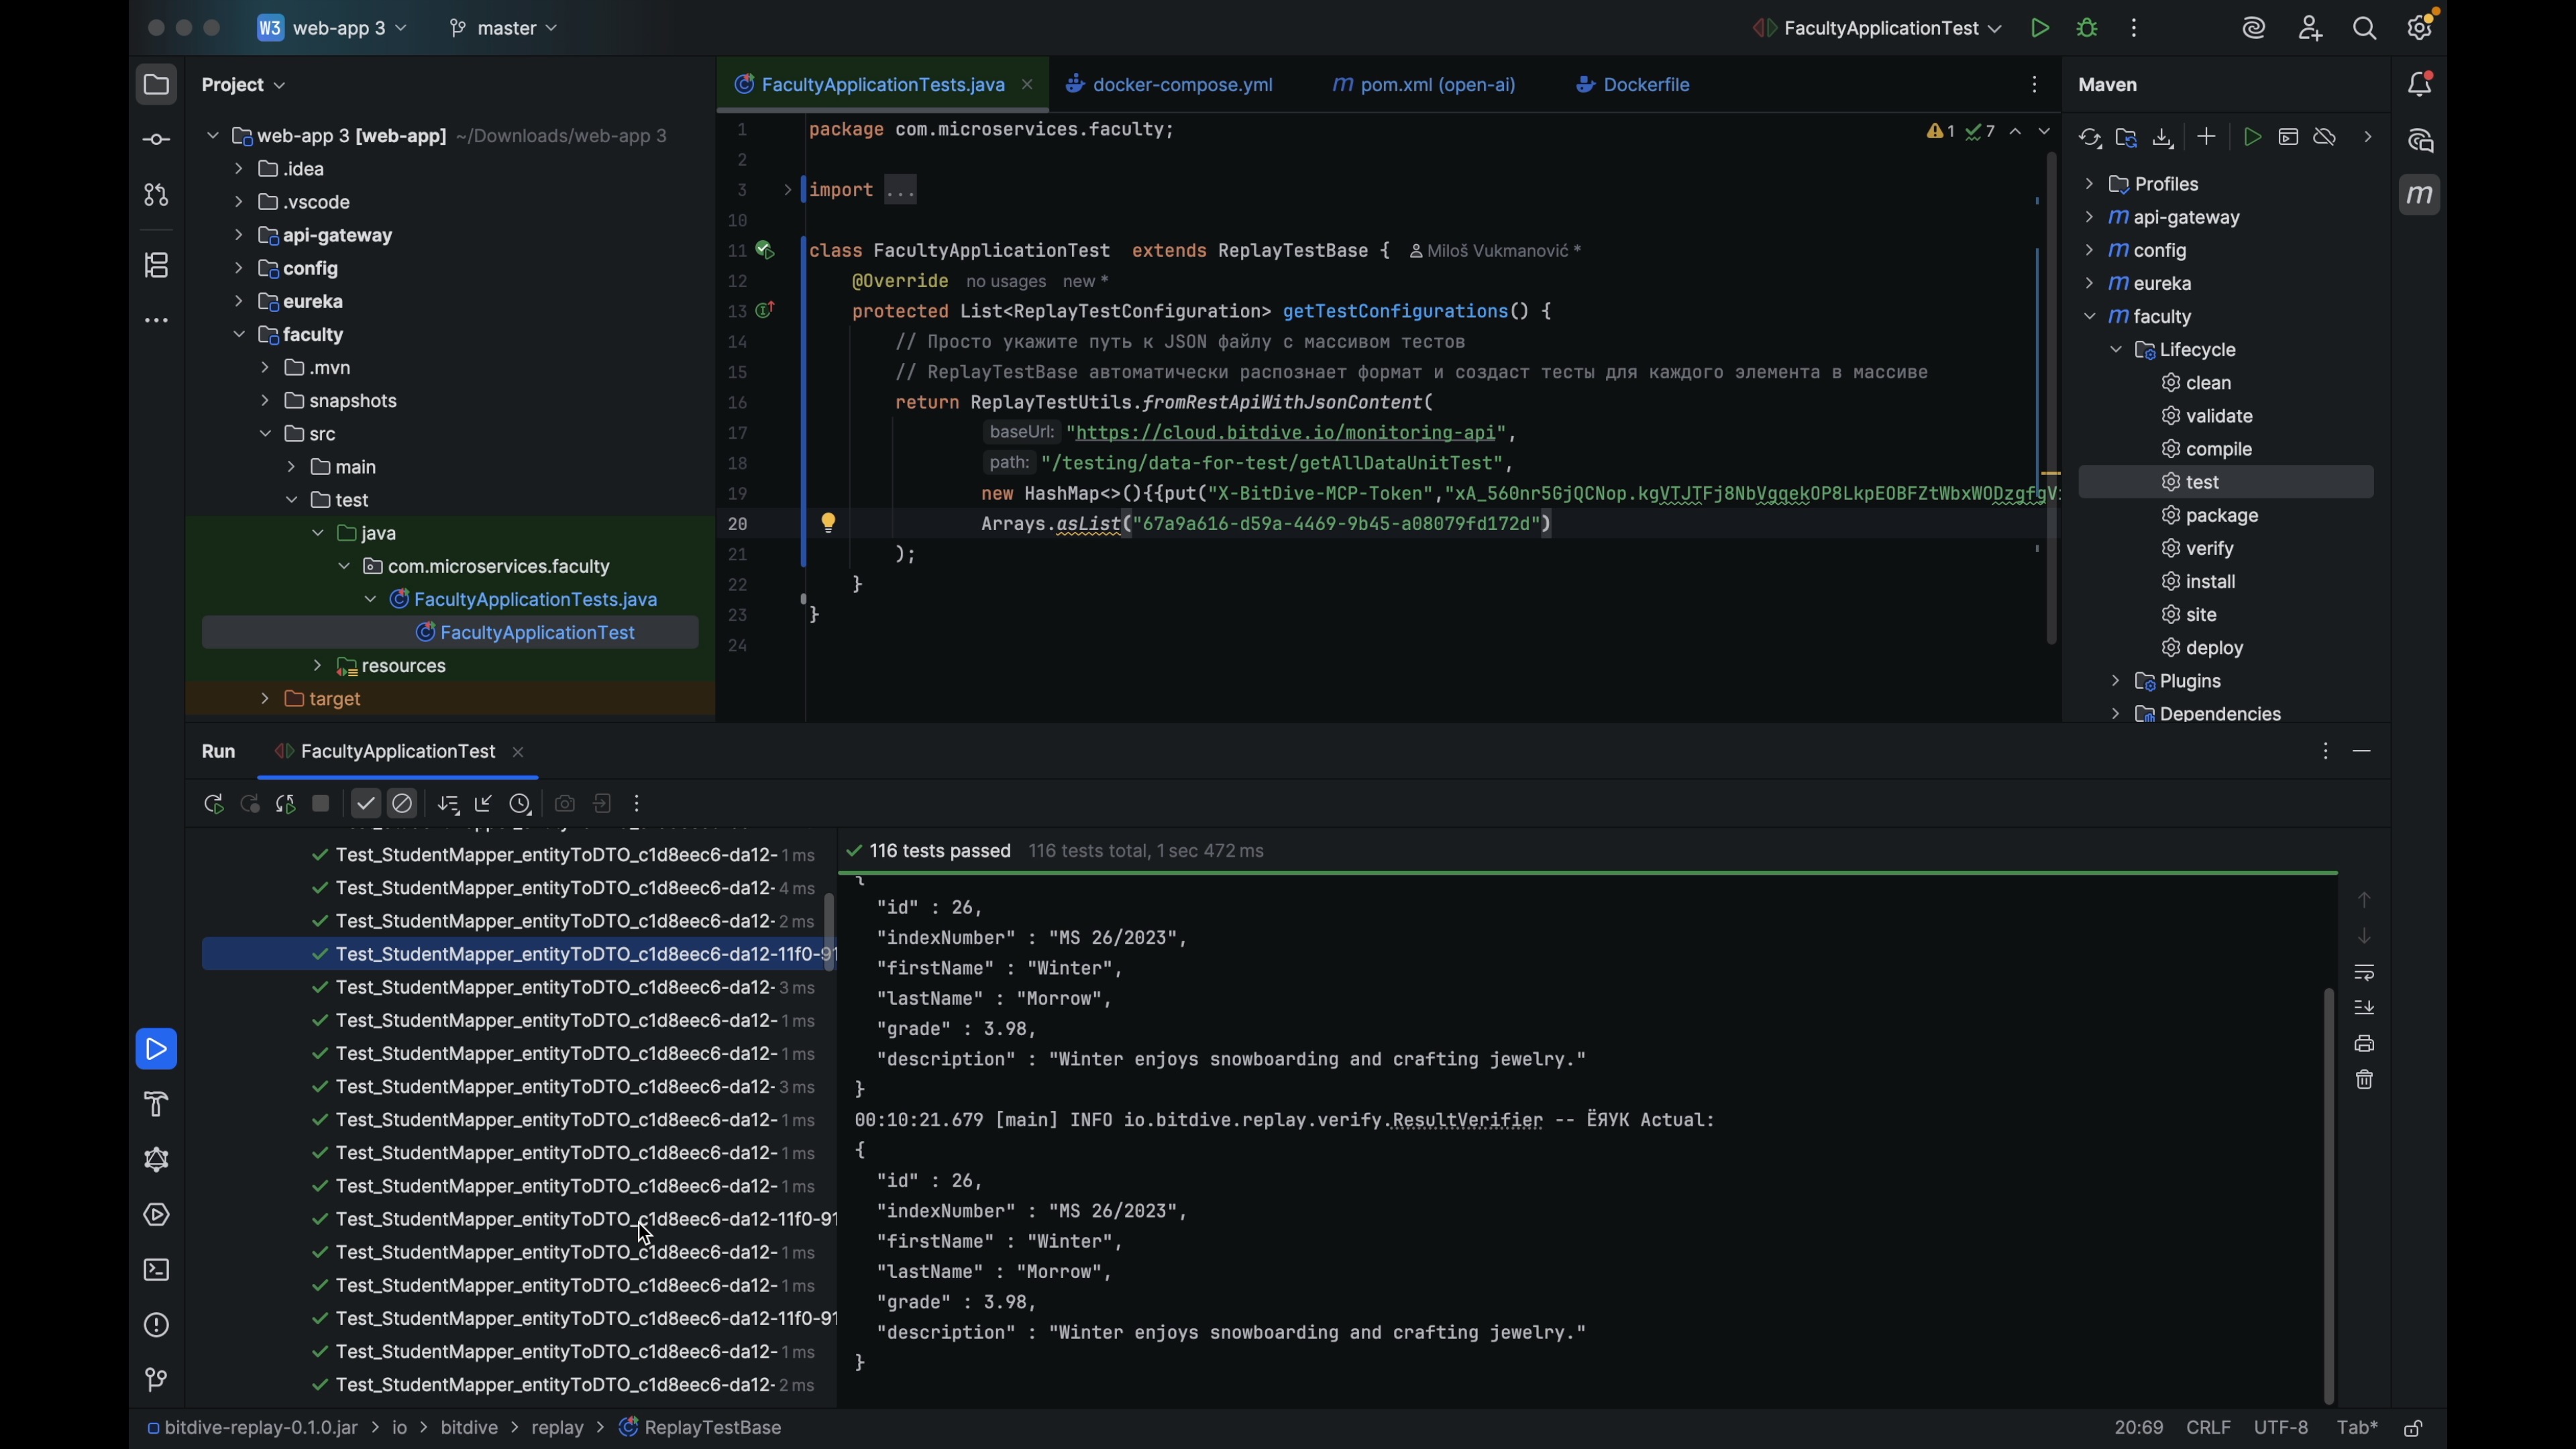
Step 7: Review Results
To see detailed validation, run the test in your IDE. You can walk through each method and see what was expected versus what actually came back.
Strategic Advantages of Trace-Based Testing
This approach delivers benefits that go beyond just saving time:
1. Zero Manual Code Means Zero Debt
Your test coverage grows based on product usage, not test code. You can achieve high coverage without managing a massive repository of test scripts. When logic changes legitimately, you capture new behavior instead of rewriting code.
2. White Box Visibility Without Logs
Traditional tests check HTTP status codes. BitDive validates the internal execution path: same SQL queries, same method calls, same dependency interactions. When a test fails, you don't hunt through logs. You see the exact divergence point in the trace.
This creates a "shared reality" between QA and developers. A failing test includes a link to the exact trace showing where behavior changed.
3. Flexible Verification Modes
BitDive offers flexible replay:
- Replay Mode: All external dependencies (databases, APIs, Kafka) are replayed from captured traces. Zero infrastructure, instant validation. Runs anywhere with
mvn test. - Testcontainers Mode: Real databases via Testcontainers with external APIs still replayed from traces. Catches schema drift and real SQL behavior.
You choose the trade-off between speed and depth per test.
Ready to Try Trace-Based Testing?
Follow our step-by-step documentation to set up your first replay test in minutes.
Read Documentation4. Protection Against Unexpected Behavior
Standard tests verify "200 OK". BitDive validates the entire execution path: who called who, in what order, with what parameters.
If a developer refactors the code and accidentally changes the query logic (for example, removing a join or altering a WHERE condition), the test will fail even if the HTTP response looks correct. These are the subtle unexpected behavior changes that slip past status-code tests and cause production incidents weeks later.
The Bottom Line
Writing unit tests shouldn't require writing unit test code. Your application's real behavior is the gold standard. Capture it. Replay it. Validate it. That's the essence of Trace-Based Testing.
Choosing the Right Automation Strategy
While BitDive focuses on runtime recording, understanding how it compares to other tools is key:
- BitDive vs. WireMock: Evolution of Virtualization
- BitDive vs. Diffblue: Recording vs. AI Guessing
- View the Market Landscape